EditorX-81 QuickStart USB-microDig
What you need
For this walkthrough, you will need:
- A USB-microDig (with hardware v7.5) and its drivers (see below).
- A Turn (or other) sensor for testing.
- EditorX software.
- Connect software (included in the EditorX software package).
- SiliconLabs driver
- LoopMIDI (Windows only)
Installing the USB-microDig
1a. On both Windows and MacOS, you'll first need to add the USB-microDig as a virtual serial (or COM) port by installing its SiliconLabs driver. If your operating system is not the most recent version, you may need to install an older driver. Keep this driver up to date ! If you encounter communication problems lateron (eg. after an operating system update), updating or simply re-installing this driver may solve them.
On MacOS, the drivers were installed correctly if the connected USB-microDig is listed in System Report (under About this Mac), in the USB section under Hardware. There should be an entry "I-CubeX USB-microDig".
On Windows, the drivers were installed correctly if the USB-microDig is listed in the Device Manager (select from the menu that appears after right-clicking on the Start menu) as a serial port with name "COM..".
On MacOS Sierra or higher, make sure to allow the driver extension in the "Security & Privacy" panel of the System Preferences, within 30 minutes after installation (or else re-install the drivers if MacOS doesn't show a way to allow the driver).
1b. On Windows, LoopMIDI virtual MIDI port software needs to be installed as well. There's no need to create any ports in LoopMIDI, nor does the LoopMIDI system tray app need to be running.
Connecting to the USB-microDig
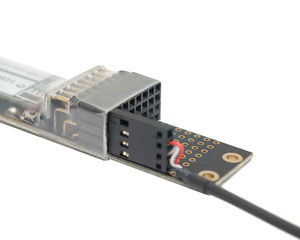
2. Connect the Turn sensor (or any other sensor) to input #1 of the USB-microDig as shown below, with the red wire on top and the black wire on the bottom.
3. Start Connect. On MacOS it may be necessary to add a security exception in order to open it. On Windows Connect must be running before starting EditorX in order for EditorX to recognize the MIDI port(s) that Connect creates.
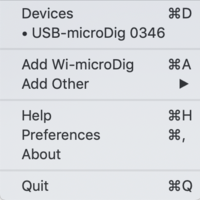
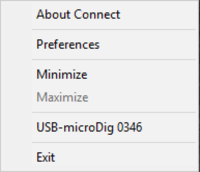
4. The USB-microDig entry with matching serial number should be listed in Connect's taskbar menu. If you don't see the USB-microDig listed, verify that the SiliconLabs driver has been installed and/or click (on MacOS) Refresh Devices on the menu or (on Windows) Refresh in the main window.
5. Start EditorX. On MacOS it may be necessary to add a security exception in order to open it. Note that on MacOS, the next time you run EditorX and Connect isn't already running, Connect should be started automatically when starting EditorX.
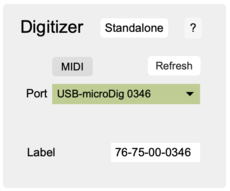
6. In the Digitizer section at the top, choose the USB-microDig with matching serial number. Upon connecting, the port menu will turn green. If EditorX failed to connect to the digitizer, maybe the Connecting section on the Digitizer page can help you resolve the issue.
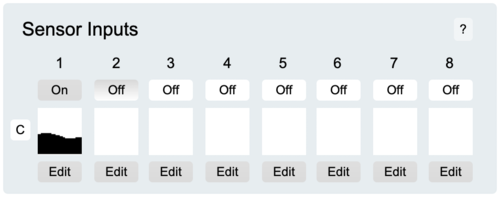
7. Click the "Off" button under number "1" in the Sensor Inputs section to turn on sampling of sensor input 1. The box right below the button will show the sensor value if changed. If it doesn't show anything, click the "Clear" button in the Settings section at the top right of EditorX, and try again to turn on the sensor input.
8. You're up and running. For further details about using EditorX, refer to the EditorX help pages.
