Difference between revisions of "Connect-150 QuickStart Wi-microDig"
| (One intermediate revision by the same user not shown) | |||
| Line 2: | Line 2: | ||
| − | [[File: | + | [[File:connect-150_main_no_devices.png]] |
| Line 27: | Line 27: | ||
| − | The Wi-microDig will then appear in the devices list with a green dot next to it to indicate that it is enabled | + | The blue LED on the Wi-microDig will turn on to indicate that a Bluetooth link has been established. Connect will then try to communicate with the Wi-microDig. If it was successful in communicating with it, it will be listed in the main menu with a bullet ("•") preceding its name. You can view the device's settings by clicking on its name in the main menu. The Wi-microDig will also appear in the devices list with a green dot next to it to indicate that it is enabled. |
By default, Connect will not attempt to establish a Bluetooth link with your Wi-microDig when it is launched. If you would like to automatically enable it, turn it on using the Auto-Enable checkbox. | By default, Connect will not attempt to establish a Bluetooth link with your Wi-microDig when it is launched. If you would like to automatically enable it, turn it on using the Auto-Enable checkbox. | ||
Latest revision as of 19:12, 12 January 2018
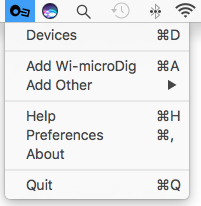
Connect runs in the background and can be accessed via the menu bar at the top of the screen. When a Wi-microDig is connected via Bluetooth Connect creates a virtual MIDI port with the name and serial number of that device.
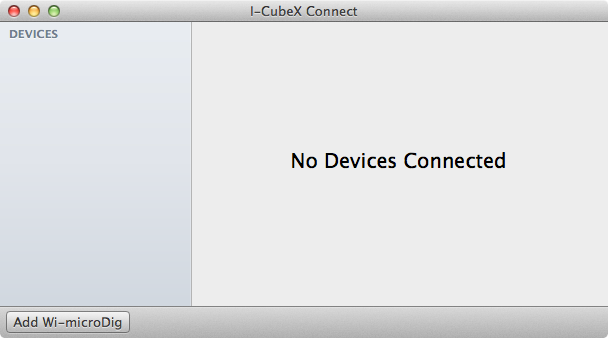
In the main window, click on the "Add Wi-microDig" button.
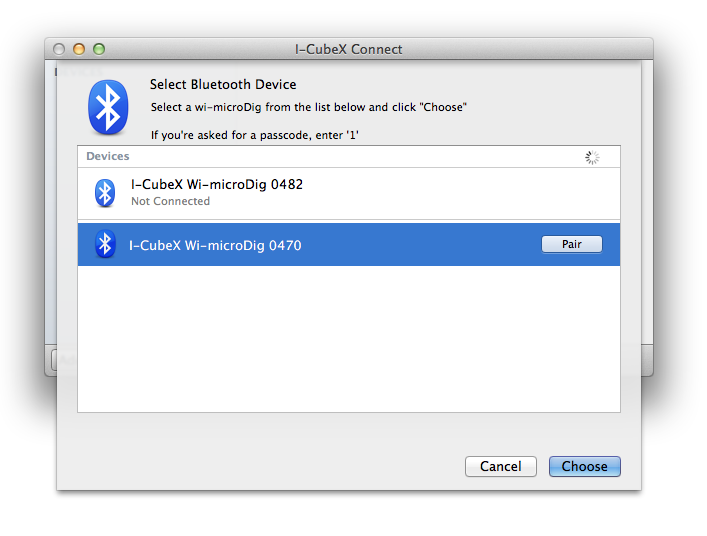
In the new window that opens, you should see your Wi-microDig appear in the list. Select it and click on the "Choose" button. If the Wi-microDig doesn't appear after a few seconds, check that it's powered on and that Bluetooth is enabled on your Mac.
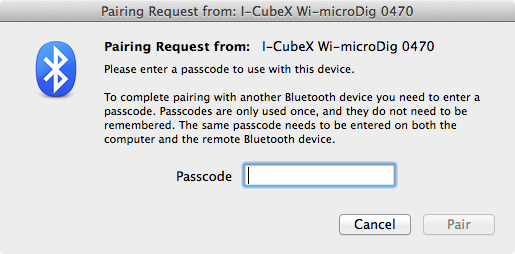
If it's the first time connecting to your Wi-microDig, you'll be asked to enter a passcode. Enter the number 1 and click "Pair".
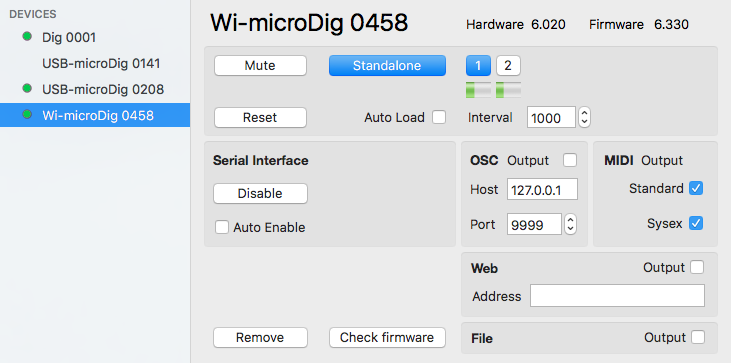
The blue LED on the Wi-microDig will turn on to indicate that a Bluetooth link has been established. Connect will then try to communicate with the Wi-microDig. If it was successful in communicating with it, it will be listed in the main menu with a bullet ("•") preceding its name. You can view the device's settings by clicking on its name in the main menu. The Wi-microDig will also appear in the devices list with a green dot next to it to indicate that it is enabled.
By default, Connect will not attempt to establish a Bluetooth link with your Wi-microDig when it is launched. If you would like to automatically enable it, turn it on using the Auto-Enable checkbox.
To remove the Wi-microDig from the device list (even when it's not connected and enabled), click on "Remove". You will then need to add it again when you next want to use it.
