Difference between revisions of "ICube Max Plugin-40 QuickStart"
| Line 8: | Line 8: | ||
# Select the MIDI ports to which the digitizer is connected or by which it is represented. | # Select the MIDI ports to which the digitizer is connected or by which it is represented. | ||
| − | |||
# Click "sync" and confirm the syncing process in the Max window. | # Click "sync" and confirm the syncing process in the Max window. | ||
| − | |||
# Plug a sensor in input 1 of the digitizer. | # Plug a sensor in input 1 of the digitizer. | ||
| − | |||
# Turn on sensor input 1 and confirm the receipt of sensor data in the number box. | # Turn on sensor input 1 and confirm the receipt of sensor data in the number box. | ||
Revision as of 18:45, 21 January 2018
This QuickStart Assumes you have installed Max already, and downloaded the iCube zip file from our website.
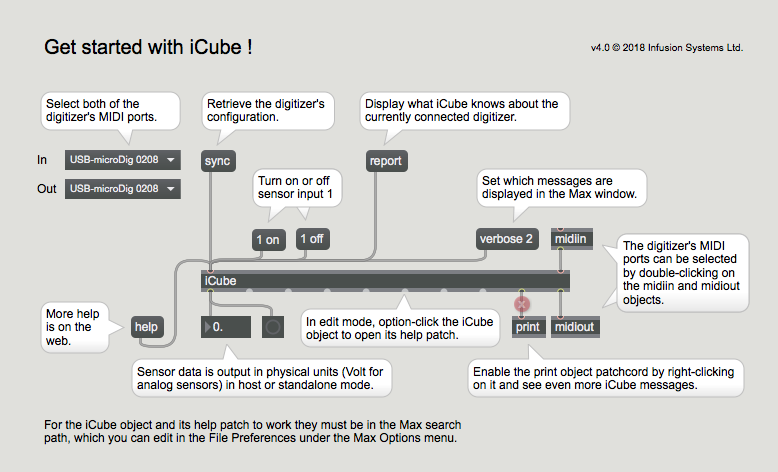
Open the iCube_start Max patch (included with the iCube object), or create it like below.
- Select the MIDI ports to which the digitizer is connected or by which it is represented.
- Click "sync" and confirm the syncing process in the Max window.
- Plug a sensor in input 1 of the digitizer.
- Turn on sensor input 1 and confirm the receipt of sensor data in the number box.
