Difference between revisions of "Connect-163 QuickStart WiDig"
| Line 8: | Line 8: | ||
==Installing the WiDig== | ==Installing the WiDig== | ||
| − | The WiDig is pre-configured to communicate via Bluetooth, even though it can still communicate via USB but at MIDI data rate of 31.25 kbps. Once you've successfully connected with Connect | + | The WiDig is pre-configured to communicate via Bluetooth, even though it can still communicate via USB but at MIDI data rate of 31.25 kbps. Once you've successfully connected with Connect to the WiDig you will be able to set the WiDig to communicate via USB only, at the higher data rate of 115.2 kbps. |
To communicate via USB, you'll first need to add the WiDig as a virtual serial (or COM) port by installing its [http://icubex.com/silabs SiliconLabs driver]. If your operating system is not the most recent version, you may need to install an [https://www.silabs.com/community/interface/knowledge-base.entry.html/2017/01/10/legacy_os_softwarea-bgvU older driver]. | To communicate via USB, you'll first need to add the WiDig as a virtual serial (or COM) port by installing its [http://icubex.com/silabs SiliconLabs driver]. If your operating system is not the most recent version, you may need to install an [https://www.silabs.com/community/interface/knowledge-base.entry.html/2017/01/10/legacy_os_softwarea-bgvU older driver]. | ||
Revision as of 03:27, 15 December 2019
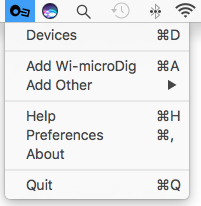
Connect runs in the background and can be accessed via the menu bar at the top of the screen. When a WiDig is plugged in Connect creates a virtual MIDI port with the name and serial number of that device.
Installing the WiDig
The WiDig is pre-configured to communicate via Bluetooth, even though it can still communicate via USB but at MIDI data rate of 31.25 kbps. Once you've successfully connected with Connect to the WiDig you will be able to set the WiDig to communicate via USB only, at the higher data rate of 115.2 kbps.
To communicate via USB, you'll first need to add the WiDig as a virtual serial (or COM) port by installing its SiliconLabs driver. If your operating system is not the most recent version, you may need to install an older driver.
The drivers were installed correctly if the connected USB-microDig is listed in System Report (under About this Mac), in the USB section under Hardware. There should be an entry "CP2104 USB to UART Bridge Controller".
On MacOS Sierra or higher, make sure to allow the driver extension in the "Security & Privacy" panel of the System Preferences, within 30 minutes after installation (or else re-install the drivers if MacOS doesn't show a way to allow the driver).
Connecting to the WiDig
Connect the WiDig to a USB port on your Mac then open Connect. On MacOS it may be necessary to add a security exception in order to open it.
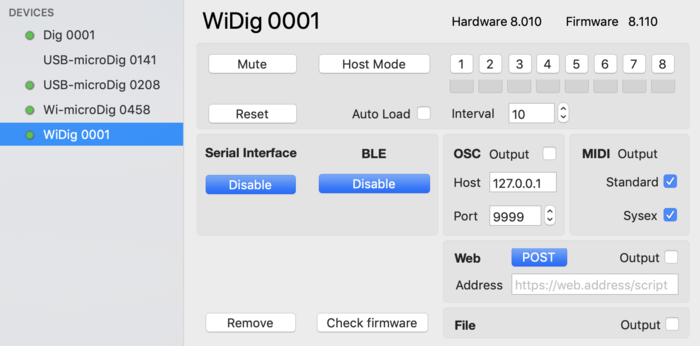
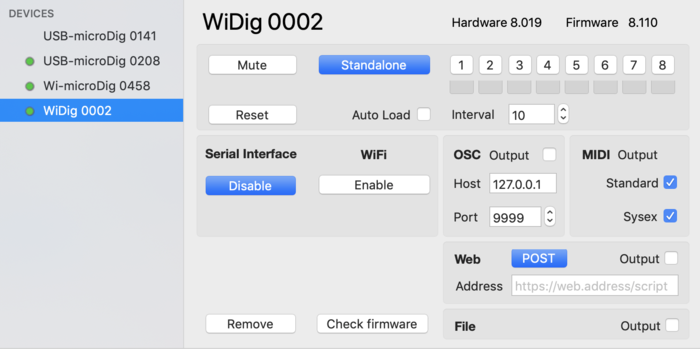
Once running, and if Connect was successful in communicating with the WiDig, a green dot will appear next to the device in Connect's digitizer view window. Connect will automatically create a virtual MIDI port for the WiDig. This MIDI port can then be used in other software programs.
The WiDig will also appear in the pull down menu. If Connect was successful in communicating with it, it will be enabled and it will be listed in the main menu with a bullet ("•") preceding its name. You can view the device's settings by clicking on its name in the main menu.
Connect will show slightly different screens depending on whether the WiDig is configured for wireless communication via BLE or via WiFi.
For detailed instructions how to setup and wirelessly use a WiDig configured for communication via BLE, see the quickstart page.
For detailed instructions how to setup and wirelessly use a WiDig configured for communication via WiFi, see the quickstart page.
If the blue LED of your WiFi-configured WiDig is blinking it is actively trying to connect to a WiFi network. During that time (about 5 minutes) it can't communicate via the serial port with Connect and hence won't appear in the devices list. Once the WiDig has connected to a WiFi network and the blue LED is steady on, or once the WiDig has ended its search for a WiFi network and the blue LED is off, click "Refresh Devices" in Connect's main pull-down menu to view the WiDig in Connect.


