Wi-microDig-601 QuickStart Windows-10
If your Wi-microdig is running firmware v6.400, the pairing will fail when reconnecting with the Wi-microDig because there is no pairing code available in firmware v6.400 and Windows doesn't offer a way to complete pairing without a code. Run firmware v6.401 to allow Windows to complete the pairing process with a pairing code. Note that Windows does allow setting up the Wi-microDig without pairing code, but it's not possible to reconnect to it without pairing code.
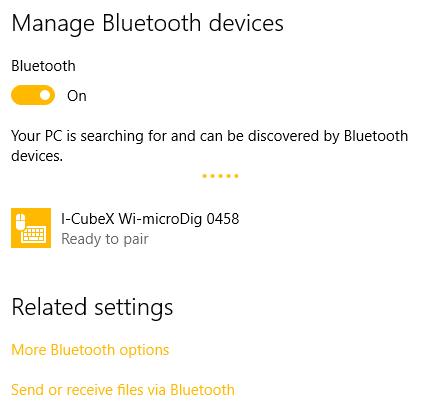
To add a Wi-microDig as a Bluetooth device in Windows 10, perform the following steps.
1. Once your Bluetooth adapter has been installed (including any necessary drivers), either click the Bluetooth icon in the system tray, or go to Start > Control Panel > Hardware & Sound > Add a Bluetooth device.
2. Click the Wi-microDig entry and then click the "Pair" button. A window will show.
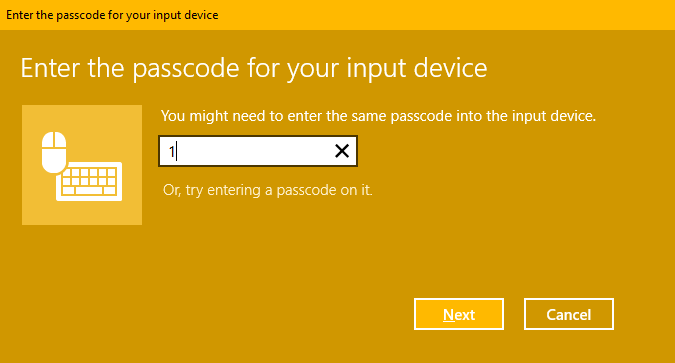
3. When you are asked to enter a passkey, enter the number 1 and click Next.
3. You should then see the following screen:
4. Finally, to figure out which COM port(s) the Wi-microDig is assigned to, go to Start > Control Panel > Hardware & Sound > Devices and Printers. Right-Click on the Wi-microDig and choose "Properties". Then, in the "Services" tab, you should see the COM port(s) listed. If there are two ports listed, ignore the one with direction "Incoming". In the example below, the applicable "Outgoing" port is COM5. The name "Outgoing" refers to the fact that the Windows computer is initiating the connection to the Wi-microDig. If you can't (re-)connect with a Wi-microDig, it may be necessary to re-create the Outgoing serial port.


