Wi-microDig-601 QuickStart Windows-7
If your Wi-microdig is running firmware v6.400, the pairing will fail when reconnecting with the Wi-microDig because there is no pairing code available in firmware v6.400 and Windows doesn't offer a way to complete pairing without a code. Run firmware v6.401 to allow Windows to complete the pairing process with a pairing code. Note that Windows does allow setting up the Wi-microDig without pairing code, but it's not possible to reconnect to it without pairing code. Use FirmwareX for Windows to upload firmware v6.401 to your Wi-microDig.
To add a Wi-microDig as a Bluetooth device in Windows 7, perform the following steps.
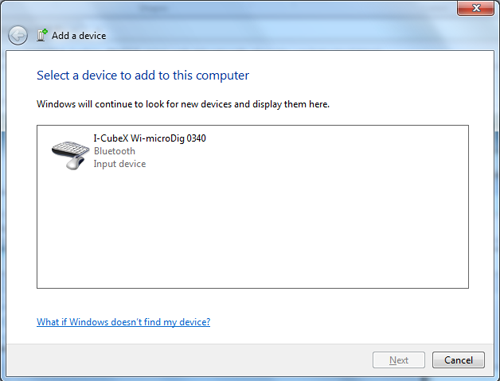
1. Once your Bluetooth adapter has been installed (including any necessary drivers), either click the Bluetooth icon in the system tray, or go to Start > Control Panel > Hardware & Sound > Add a Bluetooth device.
2. When you are asked to enter a passkey, enter the number 1 and click Next.
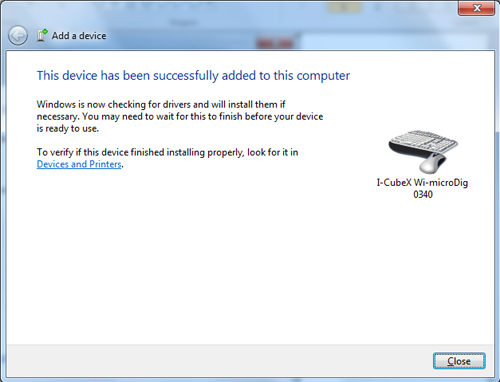
3. You should then see the following screen:
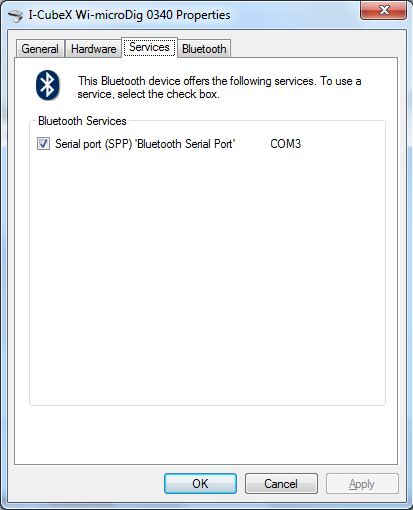
4. Finally, to figure out which COM port the Wi-microDig is on, go to Start > Control Panel > Hardware & Sound > Devices and Printers. Right-Click on the Wi-microDig and choose "Properties". Then, in the "Services" tab, you should see the COM port listed. In the example below, the port is COM3. If there are two COM ports listed, ignore the one named "Incoming" and use the one named "Outgoing".


