Connect-170 QuickStart USB-microDig
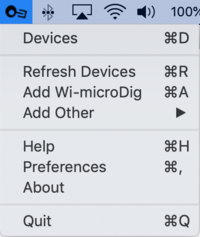
Connect runs in the background and can be accessed via the menu bar at the top of the screen. When a USB-microDig is plugged in Connect creates a virtual MIDI port with the name and serial number of that device.
Before starting Connect, make sure to quit and move any older version to a place where it can't be started automatically, or simply delete it.
After starting Connect, open the "About" window from the main menu the task bar to verify the version that is actually running.
Installing the USB-microDig
You'll first need to add the USB-microDig as a virtual serial (or COM) port by installing its SiliconLabs driver. If your operating system is not the most recent version, you may need to install an older driver.
The drivers were installed correctly if the connected USB-microDig is listed in System Report (under About this Mac), in the USB section under Hardware. There should be an entry "I-CubeX USB-microDig".
On MacOS Sierra or higher, make sure to allow the driver extension in the "Security & Privacy" panel of the System Preferences, within 30 minutes after installation (or else re-install the drivers if MacOS doesn't show a way to allow the driver).
Connecting to the USB-microDig
Connect the USB-microDig to a USB port on your Mac then open Connect. On MacOS it may be necessary to add a security exception in order to open it.
Once running, Connect will automatically create a virtual MIDI port for the USB-microDig.
On USB-microDigs with firmware 7.2 or newer the yellow and green LEDs on the USB-microDig will blink briefly. If it was in host mode the blinking of both green and yellow LEDs will stop. On USB-microDigs with firmware 7.1 or older the red power LED will stop blinking to indicate that it is enabled.
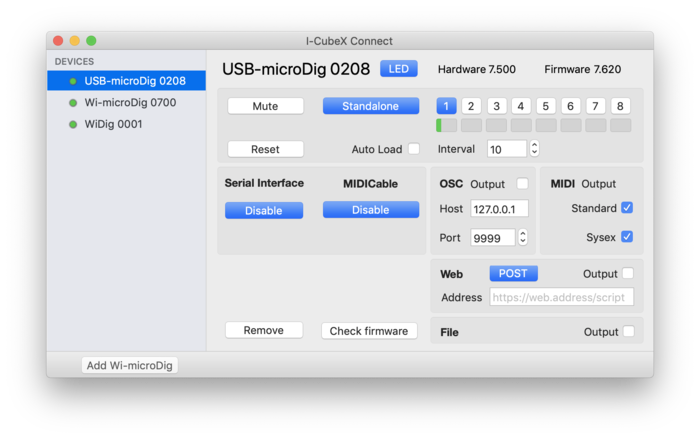
In Connect, a green dot will appear next to the device in Connect's digitizer view window.
The USB-microDig will also appear in the pull down menu. If Connect was successful in communicating with it, it should be enabled and it will be listed in the main menu with a bullet ("•") preceding its name. You can view the device's settings by clicking on its name in the main menu.

