This document describes how to create a virtual MIDI port for your USB-microDig or Wi-microDig in Windows 7. The first section describes the USB-microDig. Jump to Wi-microDig
Connecting to the USB-microDig
To connect to the USB-microDig you will need the following software:
- BlueMIDI (included with Editor installer)
- Virtual COM port driver (included with Editor installer, also available here.
- Virtual MIDI port software, such as loopMIDI.
Installing and Using LoopMIDI to create a virtual MIDI port
This document will use LoopMIDI, which you can download
here.
Run the installer, and then double click to launch loopMIDI. It will appear on the bottom of the screen, in the system tray.
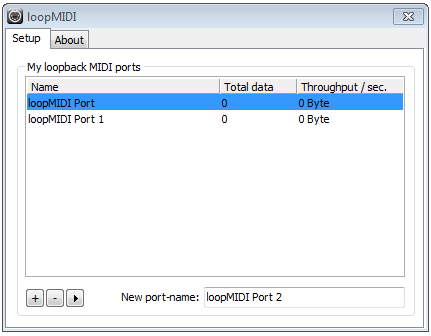
Start LoopMIDI. Using the "+" button, add two ports, 1 for "IN" and one for "OUT". The window should look like this:
Finding which COM port your USB-microDig is using
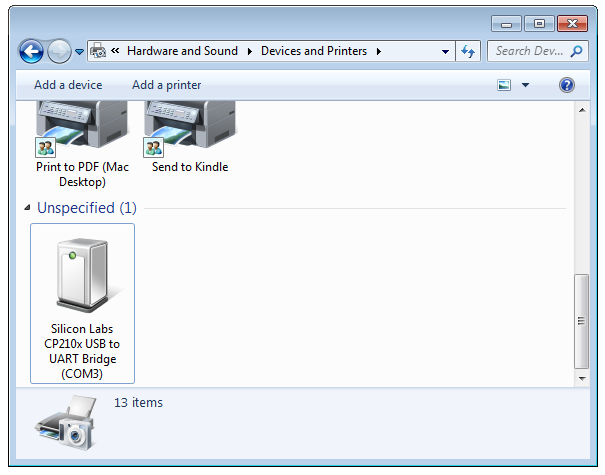
Your USB-microDig appears as a serial port device. To find out which COM port it's using, click on the Start button and then go to "Devices and Printers". (Alternatively, "Devices and Printers" can be found in the Control Panel under the Hardware and Sound category).
The USB-microDig will be listed as "Silicon Labs CP210x USB to UART Bridge" (This is the device the USB-microDig uses to create the serial port). The COM port will be listed in the title. For further information, you can right-click and select "Properties".
Connecting to the USB-microDig with BlueMIDI
BlueMIDI is used to connect the USB-microDig and the virtual MIDI port set up in LoopMIDI.
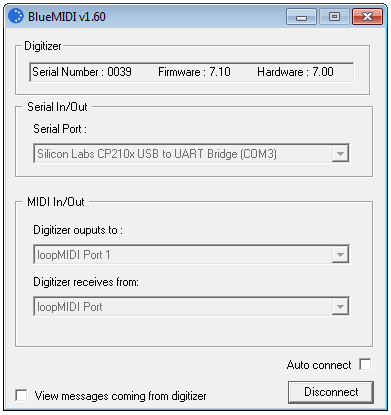
Open BlueMIDI and select the COM port of your USB-microDig and click "Connect". You should see the following:
You are now ready to communicate with your Wi-microDig through the MIDI ports "loopMIDI Port" and "loopMIDI Port 1".
Connecting to the Wi-microDig
To connect to the USB-microDig you will need the following software:
- BlueMIDI (included with Editor installer)
- Virtual COM port driver (included with Editor installer, also available here.
- Virtual MIDI port software, such as loopMIDI.
Installing and Using LoopMIDI to create a virtual MIDI port
This document will use LoopMIDI, which you can download
here.
Run the installer, and then double click to launch loopMIDI. It will appear on the bottom of the screen, in the system tray.
Start LoopMIDI. Using the "+" button, add two ports, 1 for "IN" and one for "OUT". The window should look like this:
Adding your Wi-microDig as a Bluetooth device
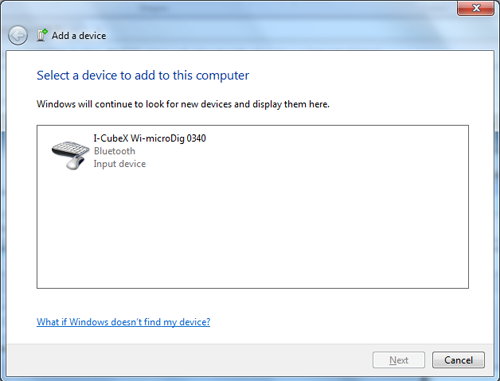
Once your Bluetooth adapter has been installed (including any necessary drivers), either click the Bluetooth icon in the system tray, or go to Start > Control Panel > Hardware & Sound > Add a Bluetooth device.
When you are asked to enter a passkey, enter the number 1 and click Next.
You should then see the following screen:
Finding which COM port your USB-microDig is using
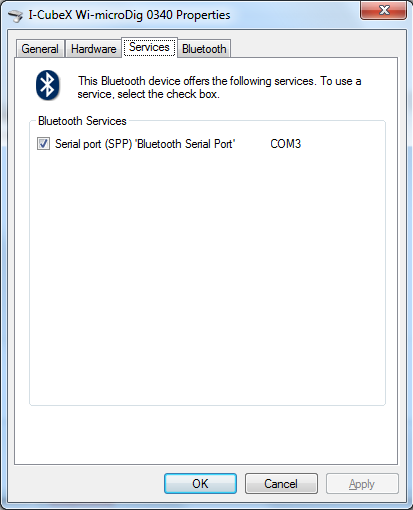
To figure out which COM port the Wi-microDig is on, go to Start > Control Panel > Hardware & Sound > Devices and Printers. Right-Click on the Wi-microDig and choose "Properties". Then, in the "Services" tab, you should see the COM port listed. In the example below, the port is COM3.
Connecting to the USB-microDig with BlueMIDI
BlueMIDI is used to connect the USB-microDig and the virtual MIDI port set up in LoopMIDI.
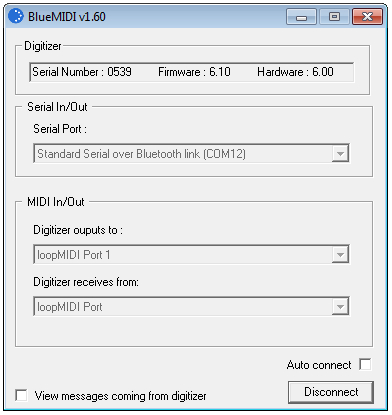
Open BlueMIDI and select the COM port of your Wi-microDig and click "Connect". You should see the following:
You are now ready to communicate with your Wi-microDig through the MIDI ports "loopMIDI Port" and "loopMIDI Port 1".


 LinkedIn group