|
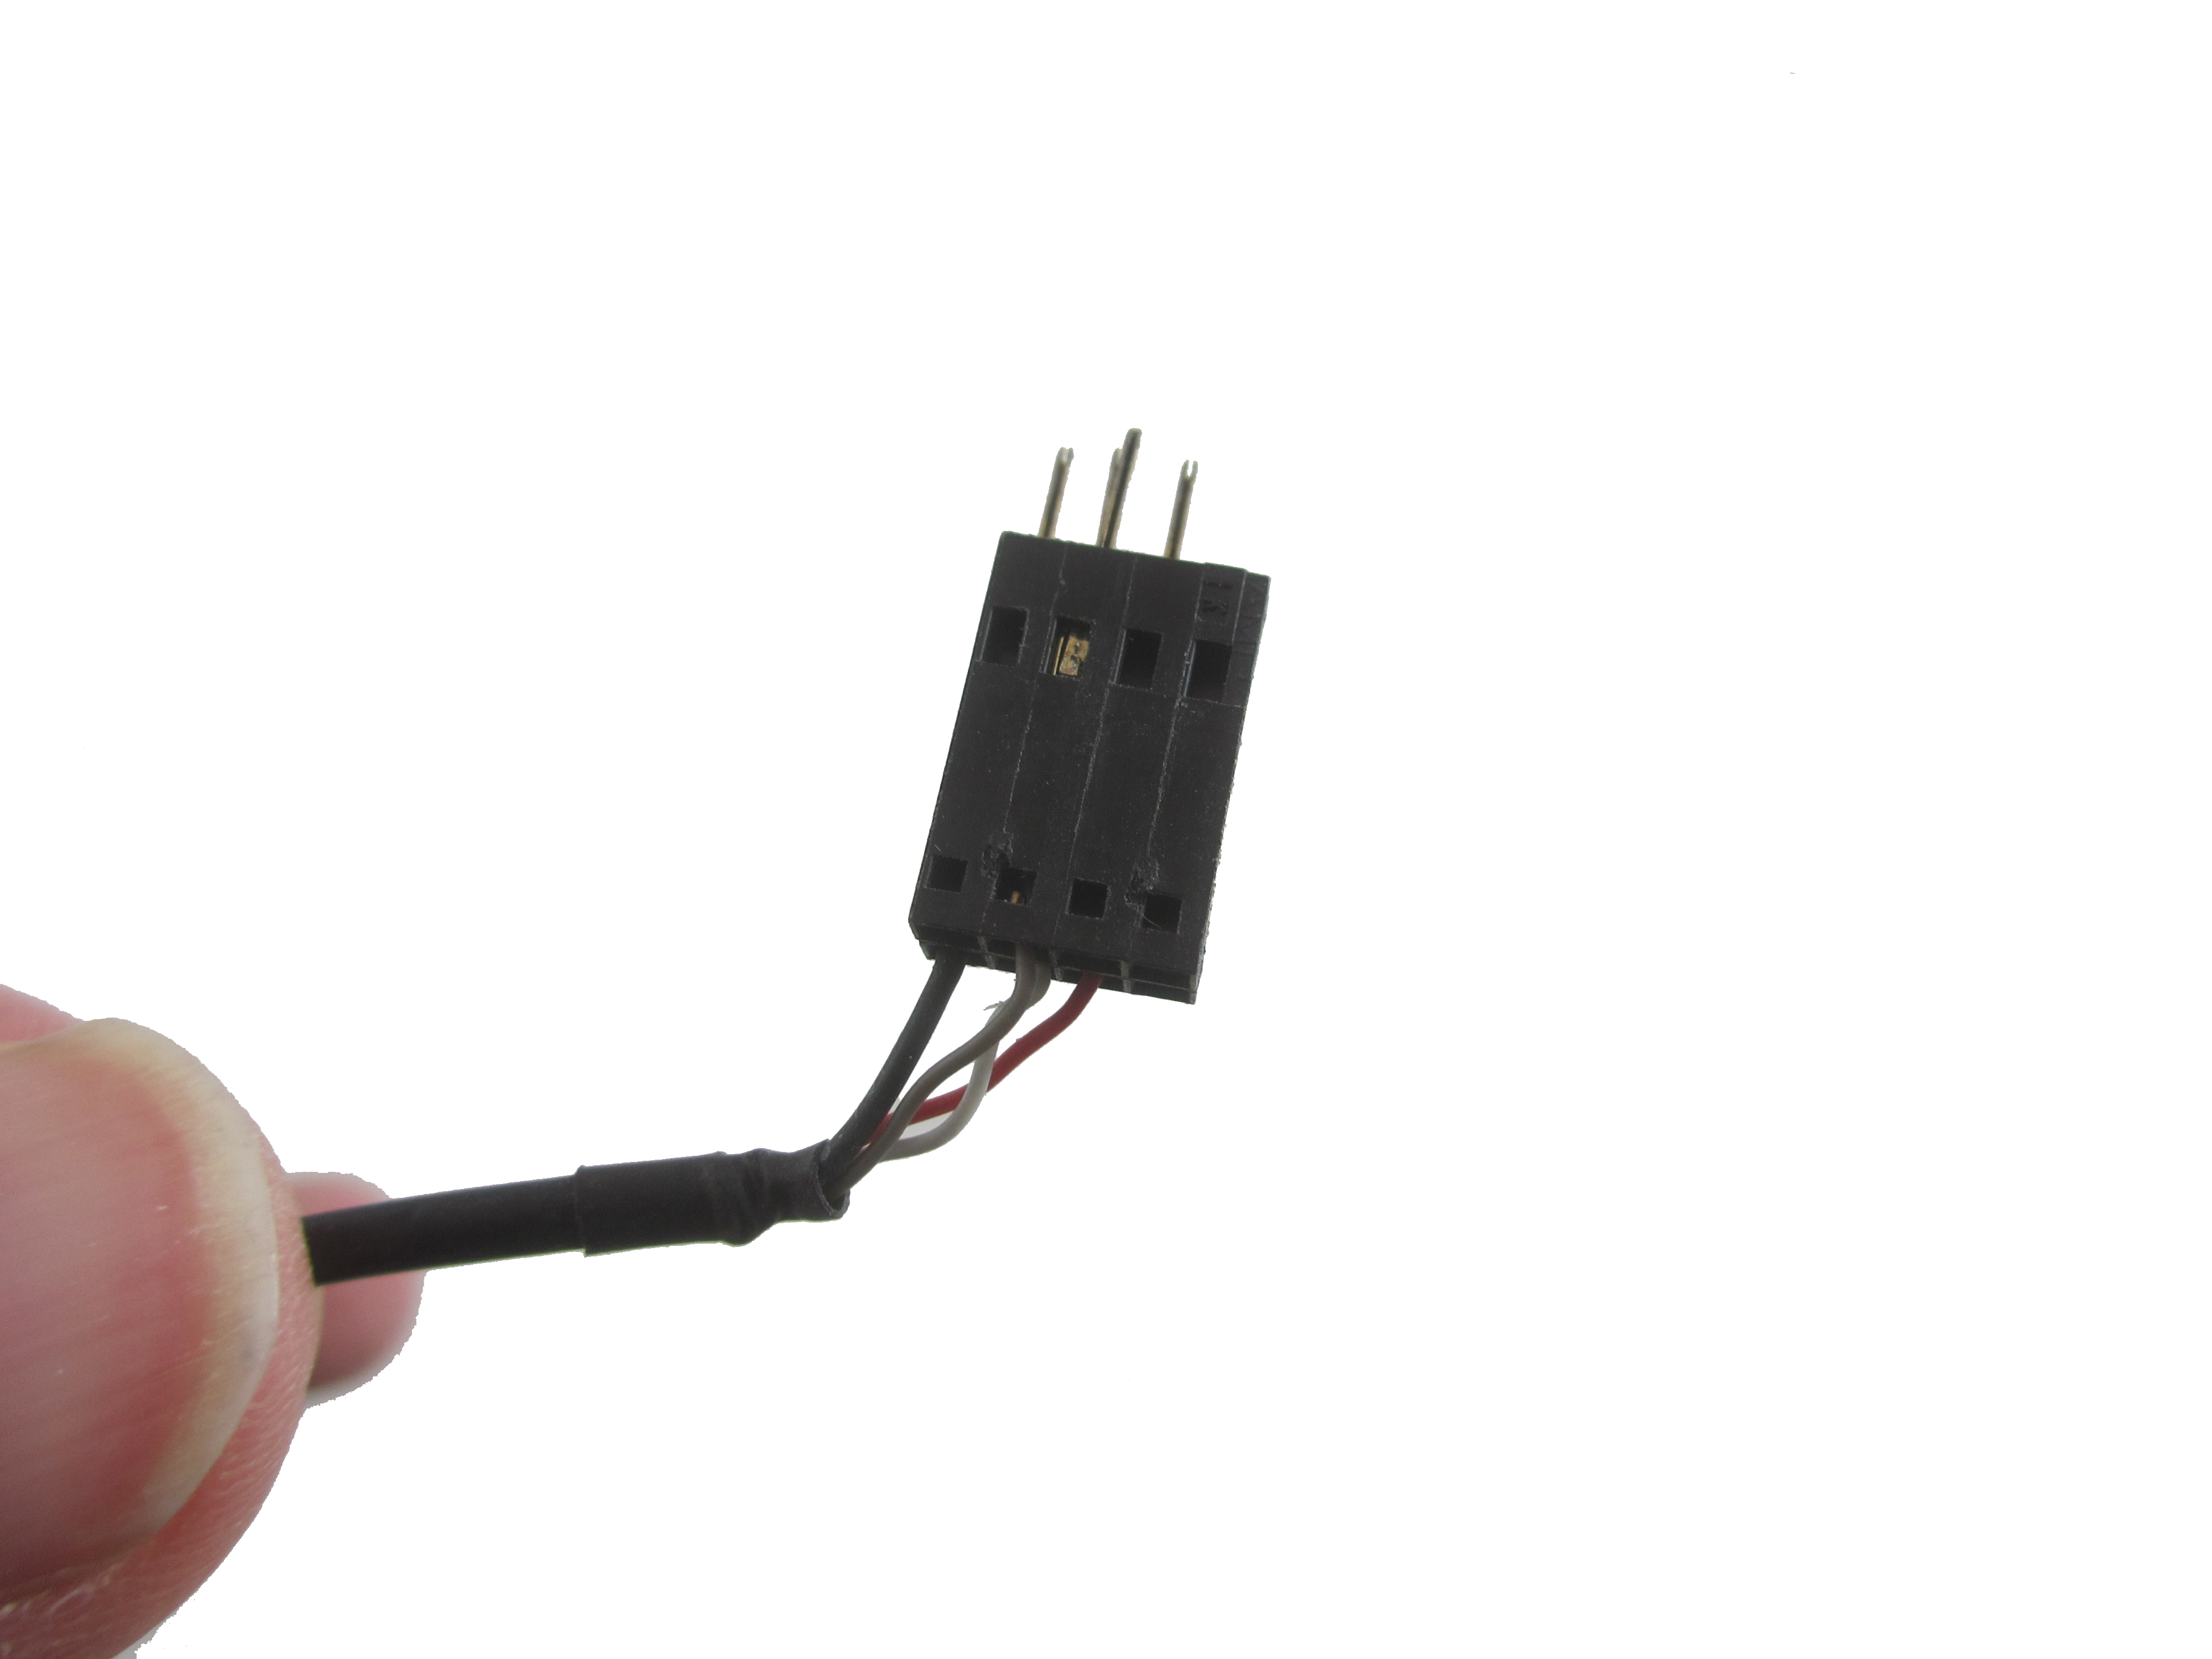
Firmware v7.3 requires digital (I2C) sensors to use only a single column (1x4 positions) of the digitizer's input / output connector, saving space so that more devices can be connected than with previous firmware versions. To modify the plug of a digital sensor's plug perform the steps as described below. If you use the sensor both with a USB-microDig as well as with a Wi-microDig, then, after upgrading the plug, the sensor needs an adapter cable to use it with the Wi-microDig because the Wi-microDig uses two columns (2x4 positions) of the input / output connector to communicate with the digital sensor. See AdaptCableKit, HackPlugs and AdaptCable2DtoD. Note that the below instructions are for connectors that use HackPlugs v1.0. Here are instructions for downgrading an I2C plug.
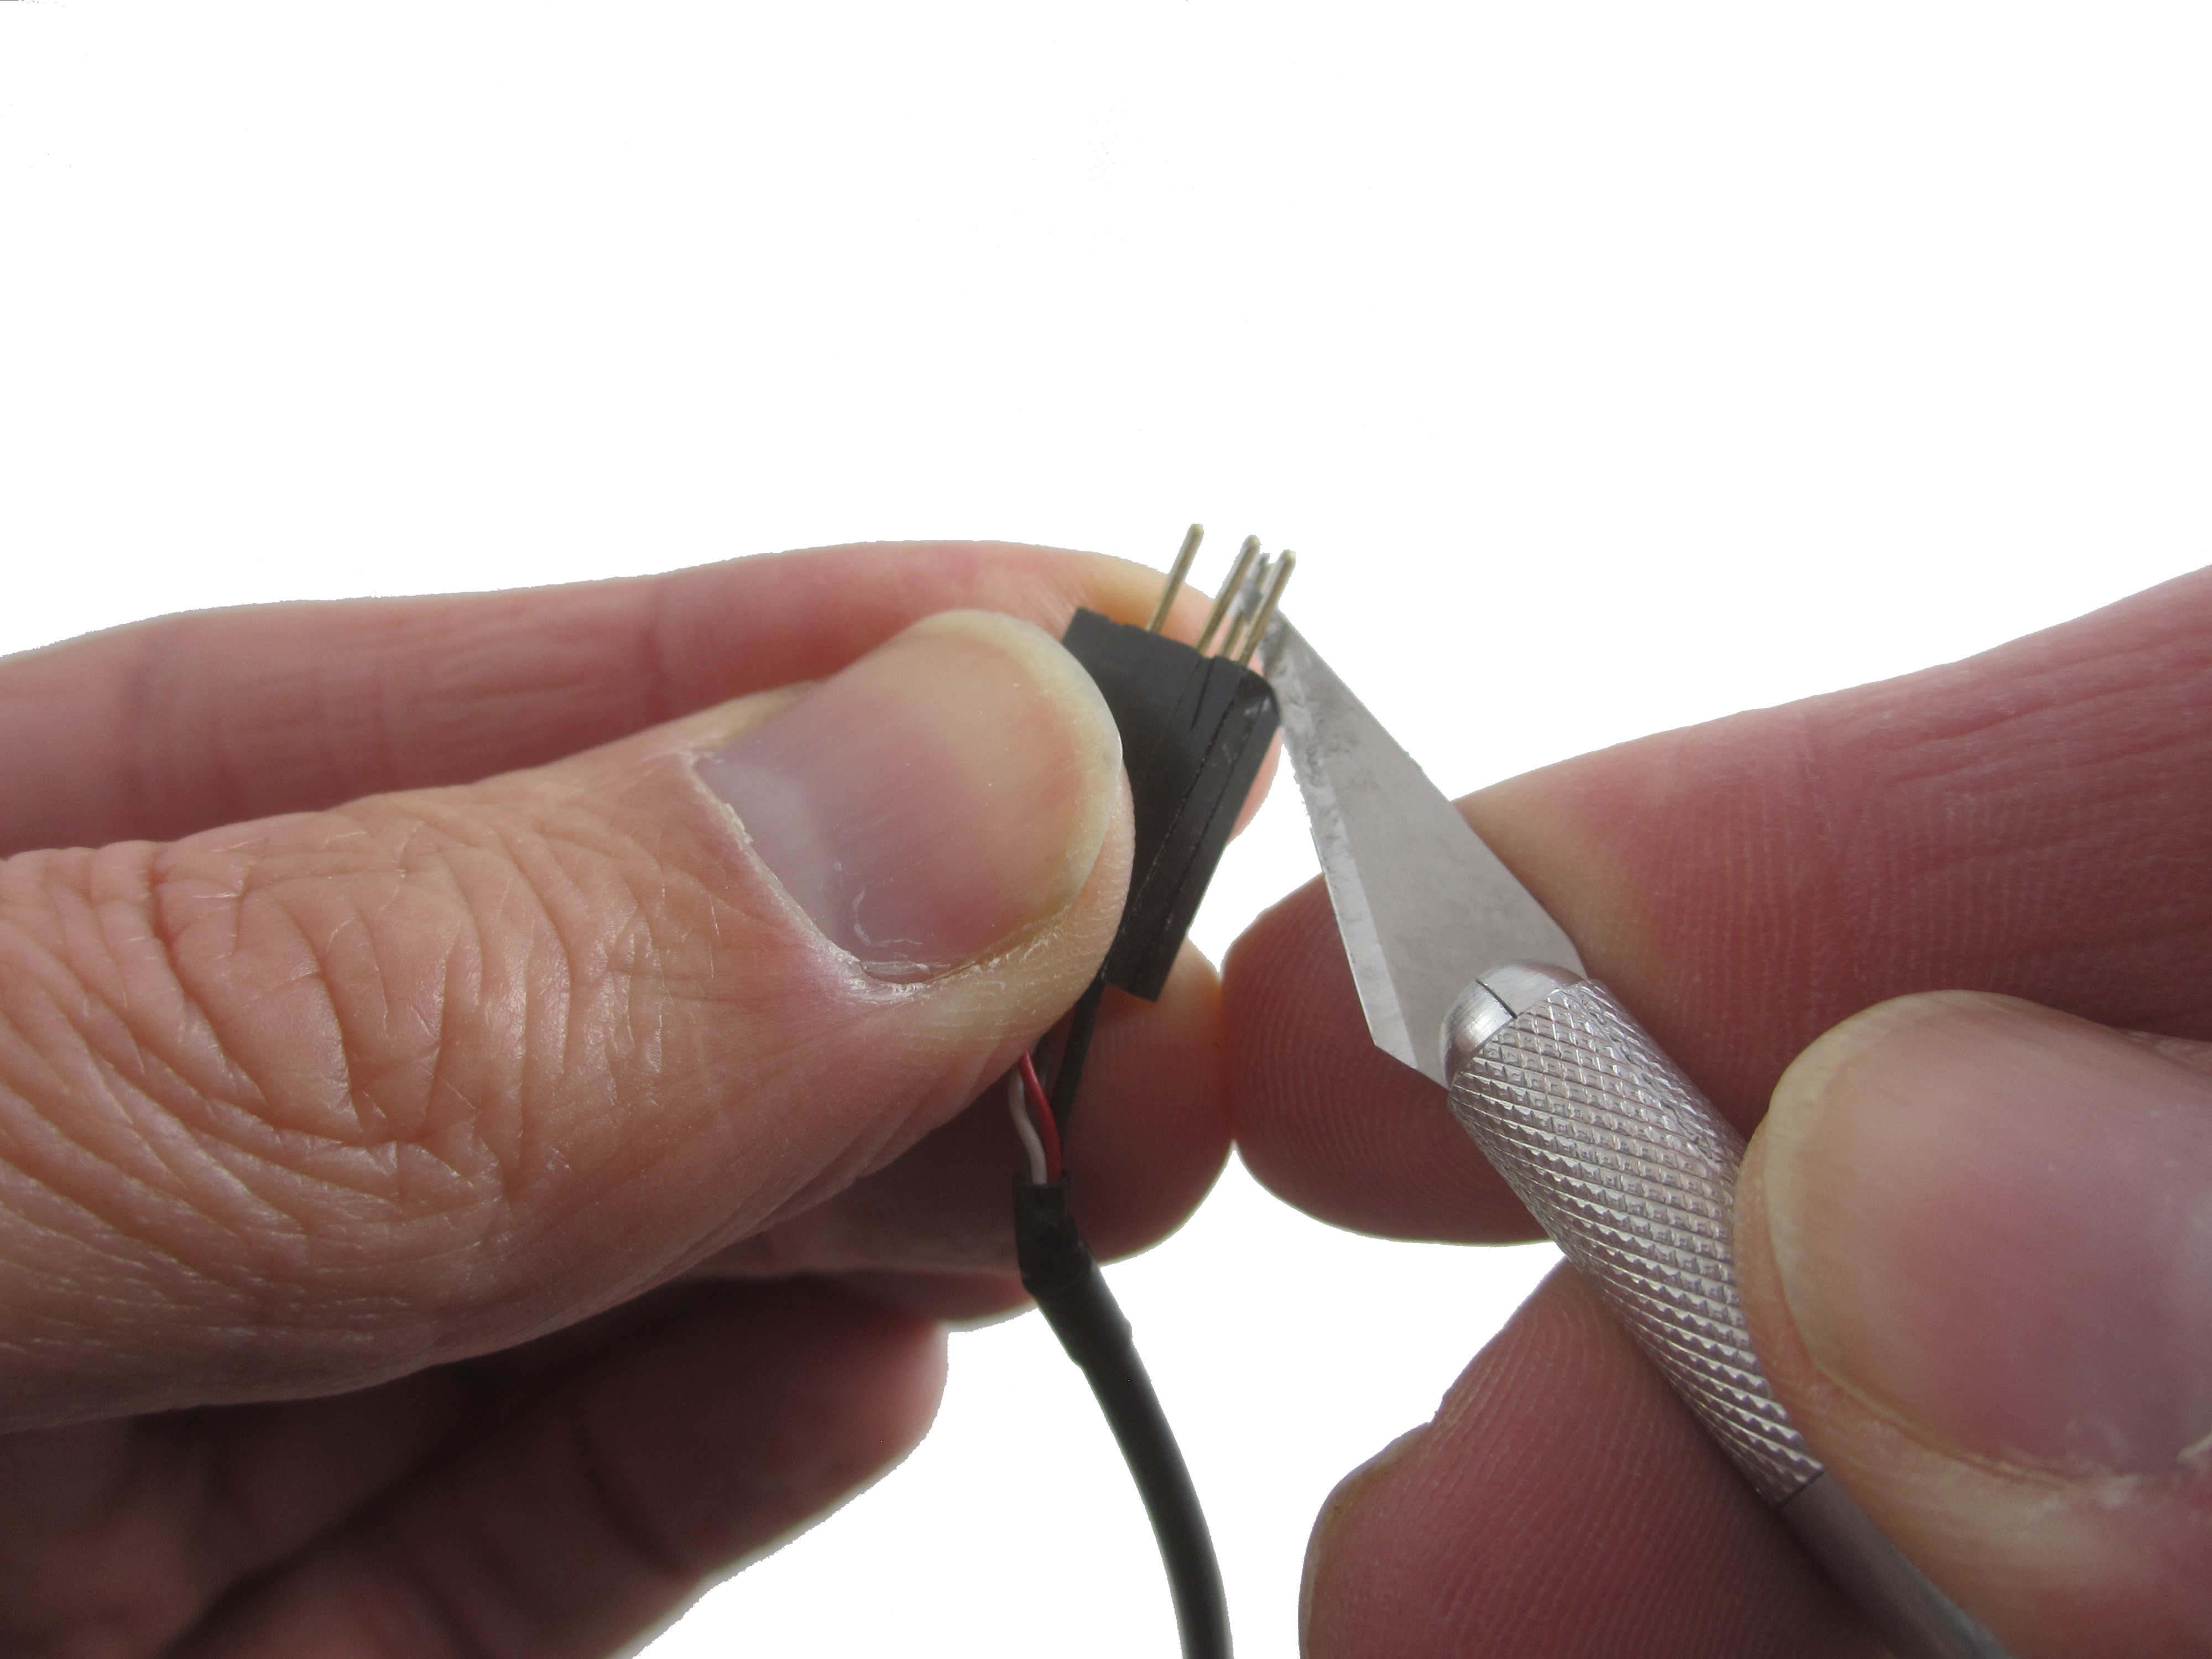
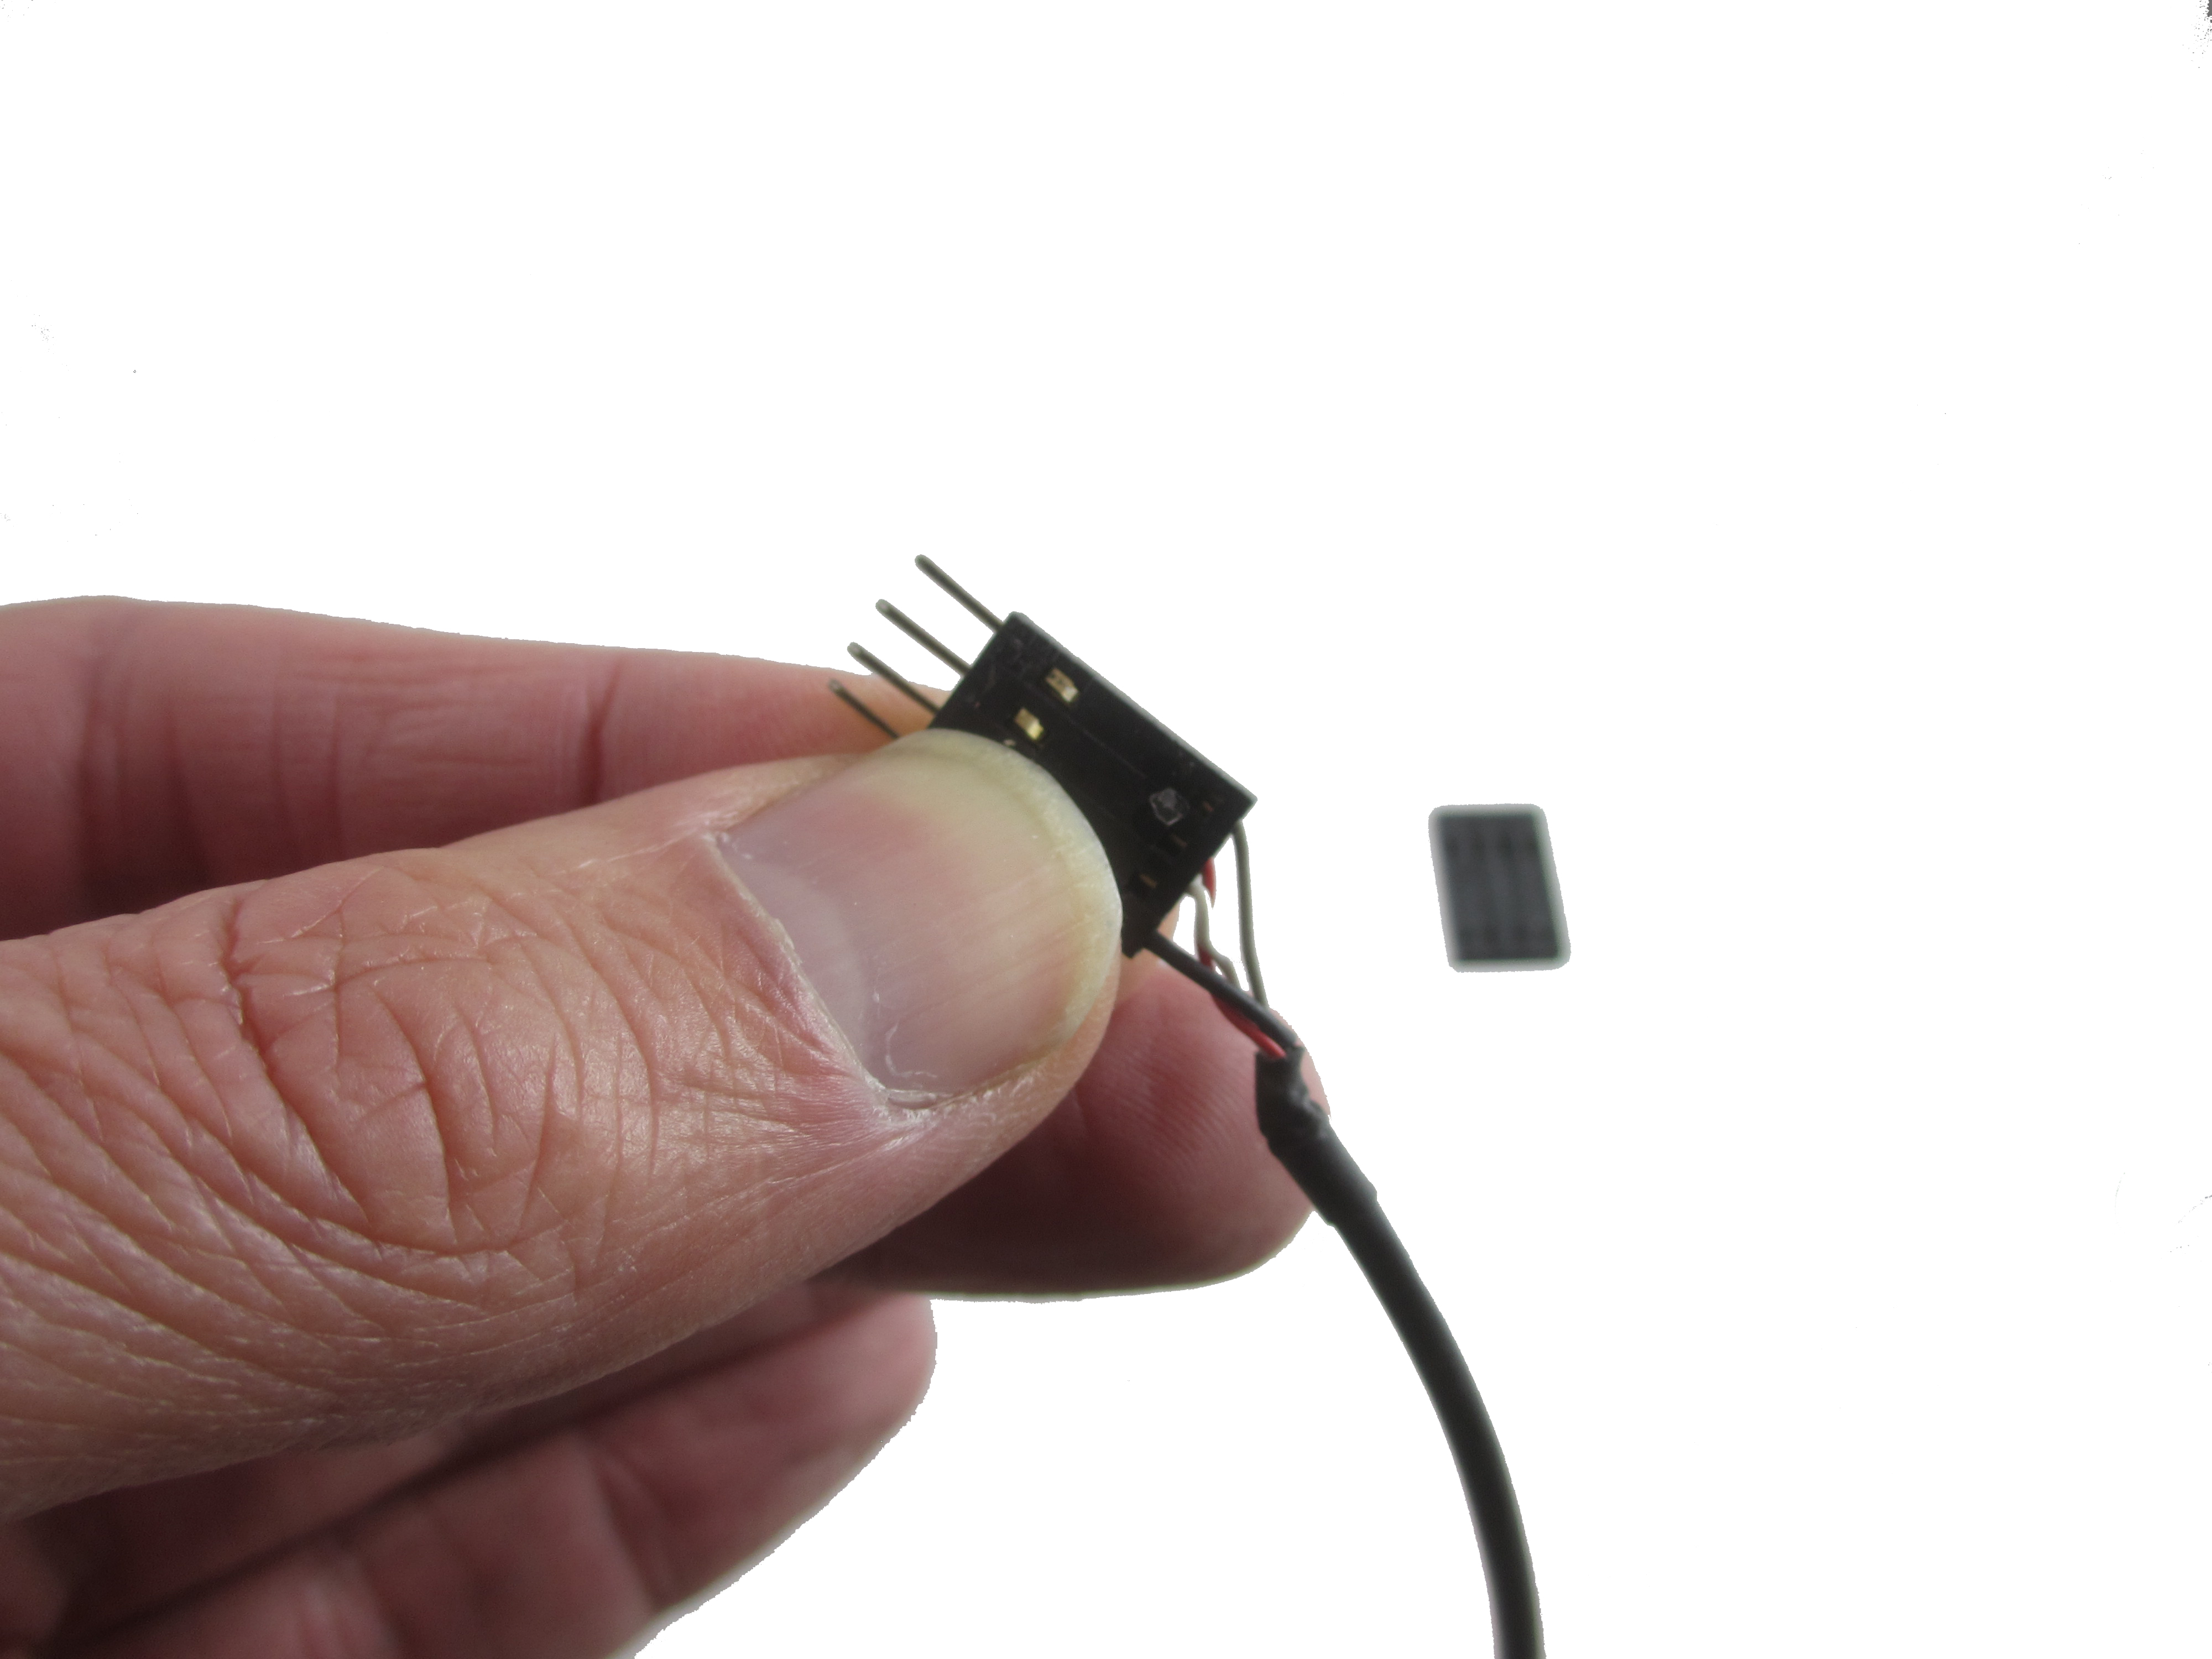
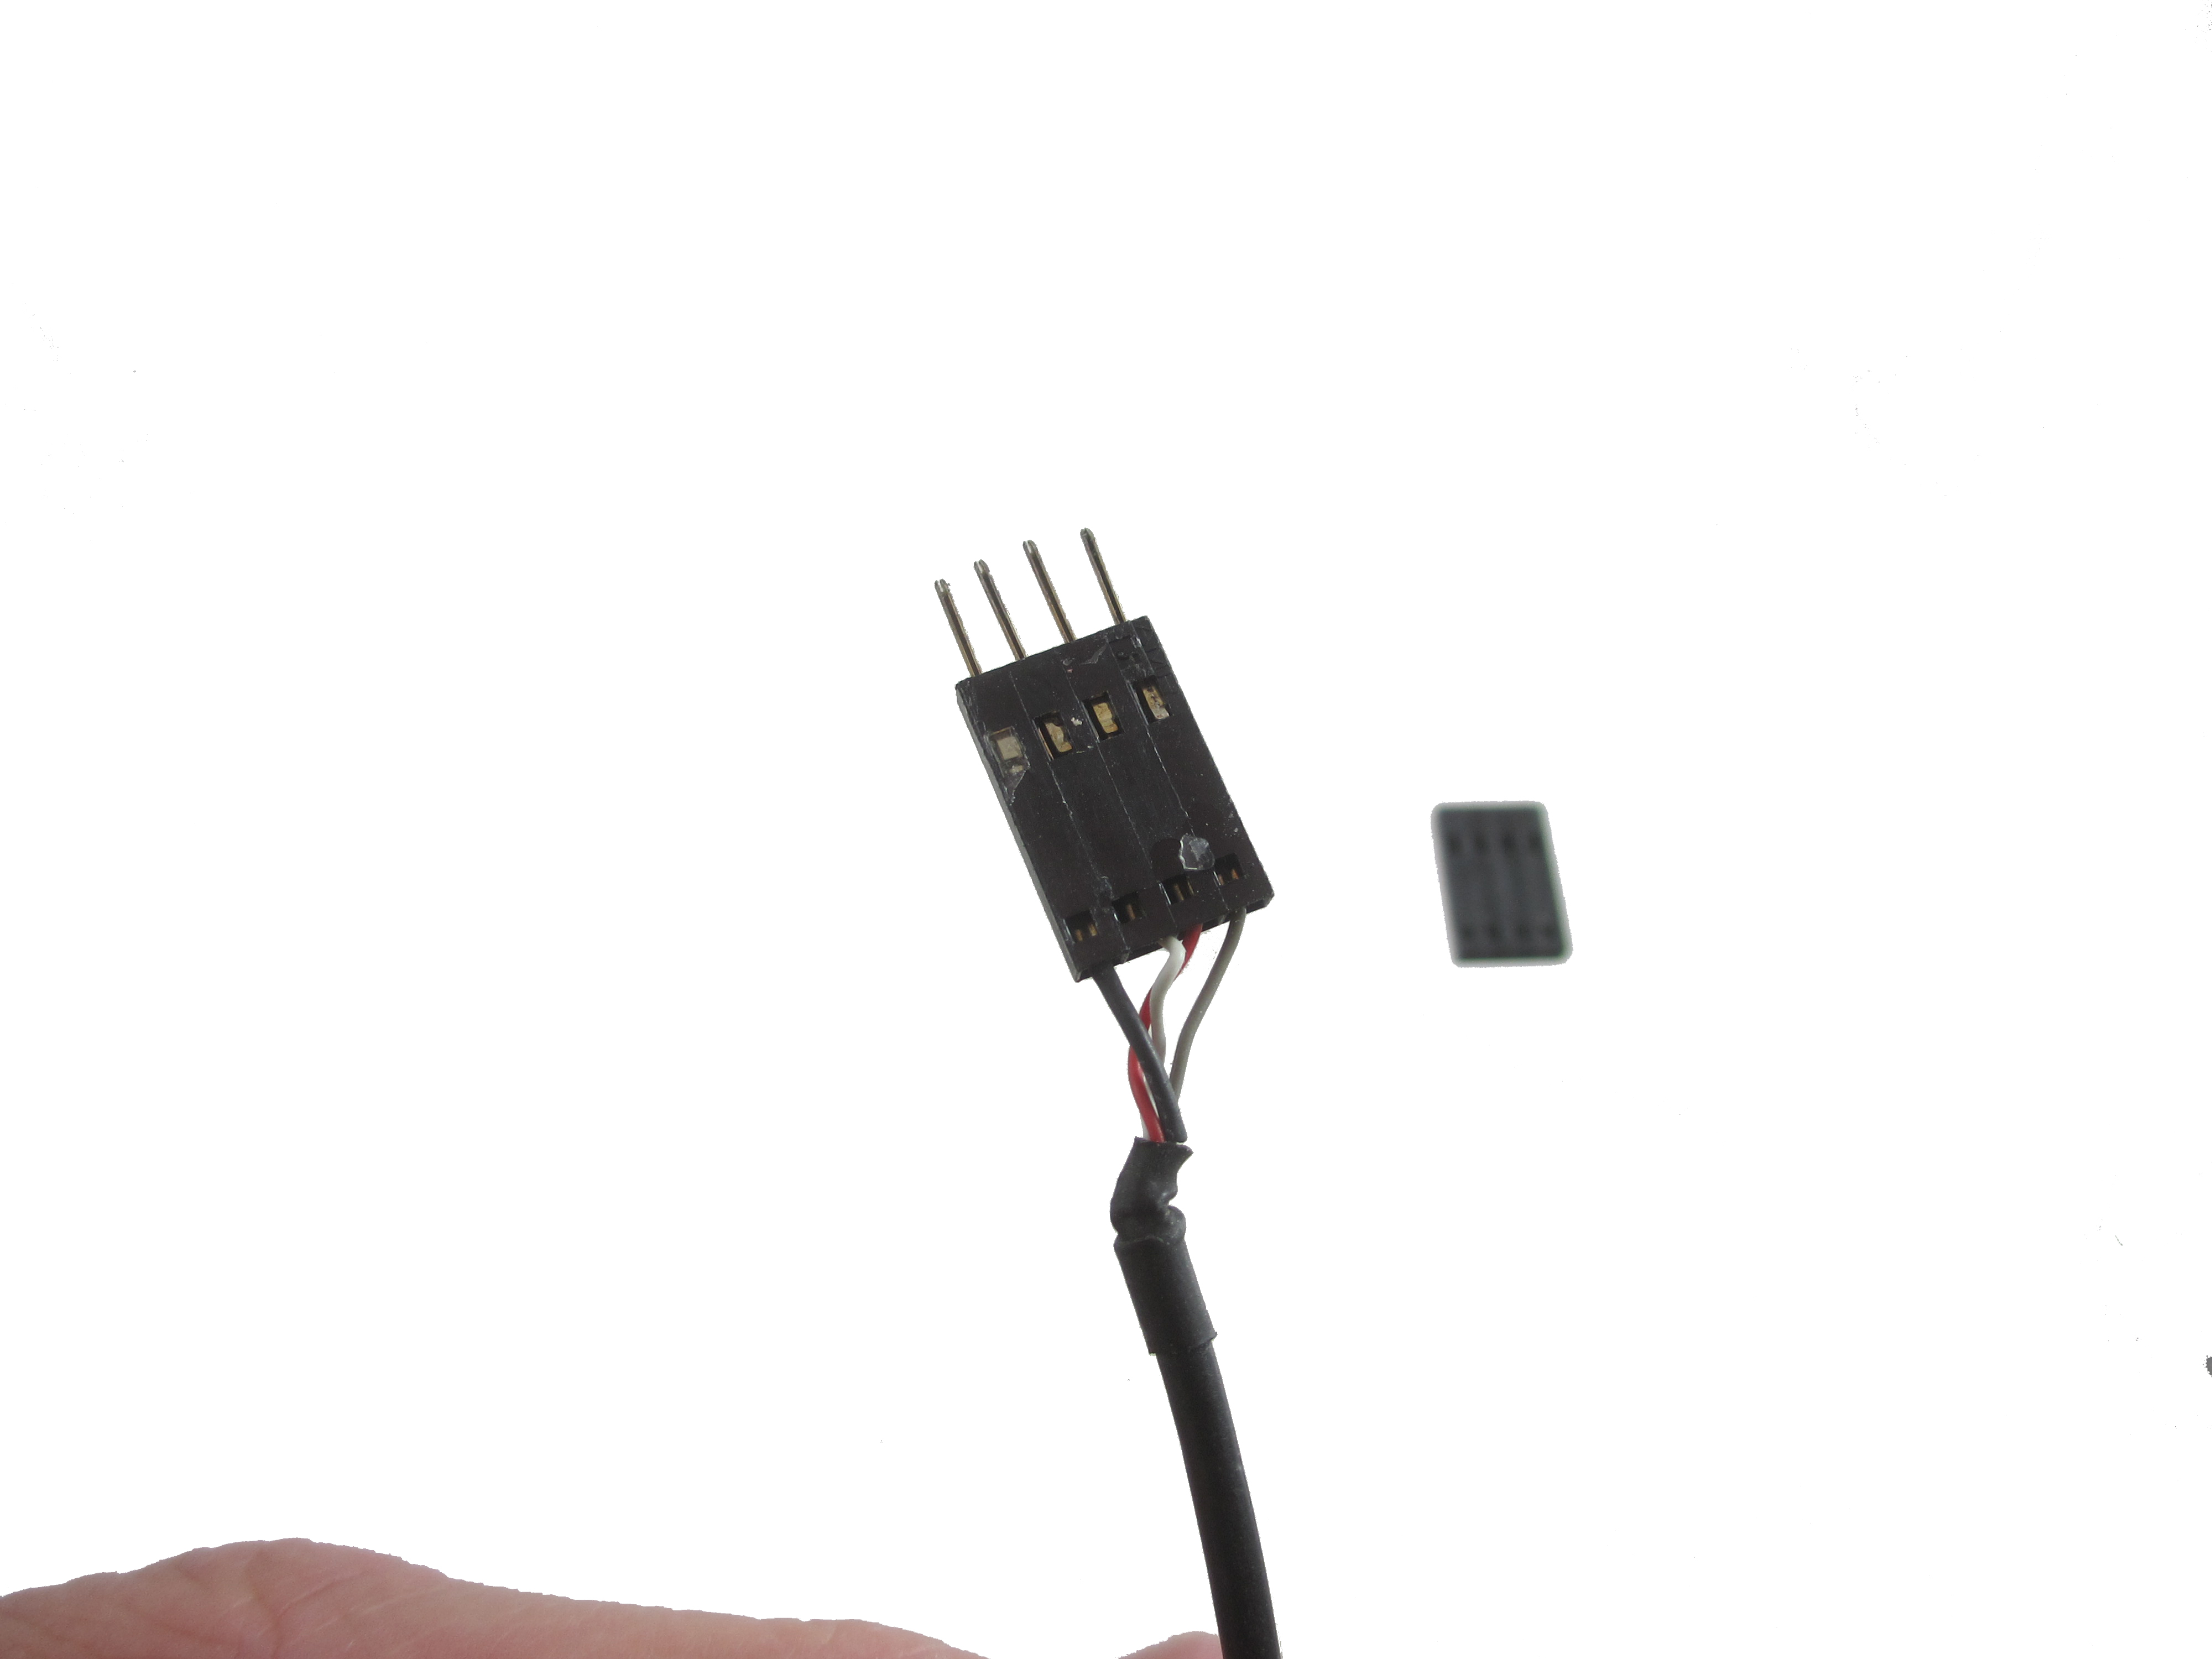
- Split the plug with a sharp knife so that there are two 1x4 housings.
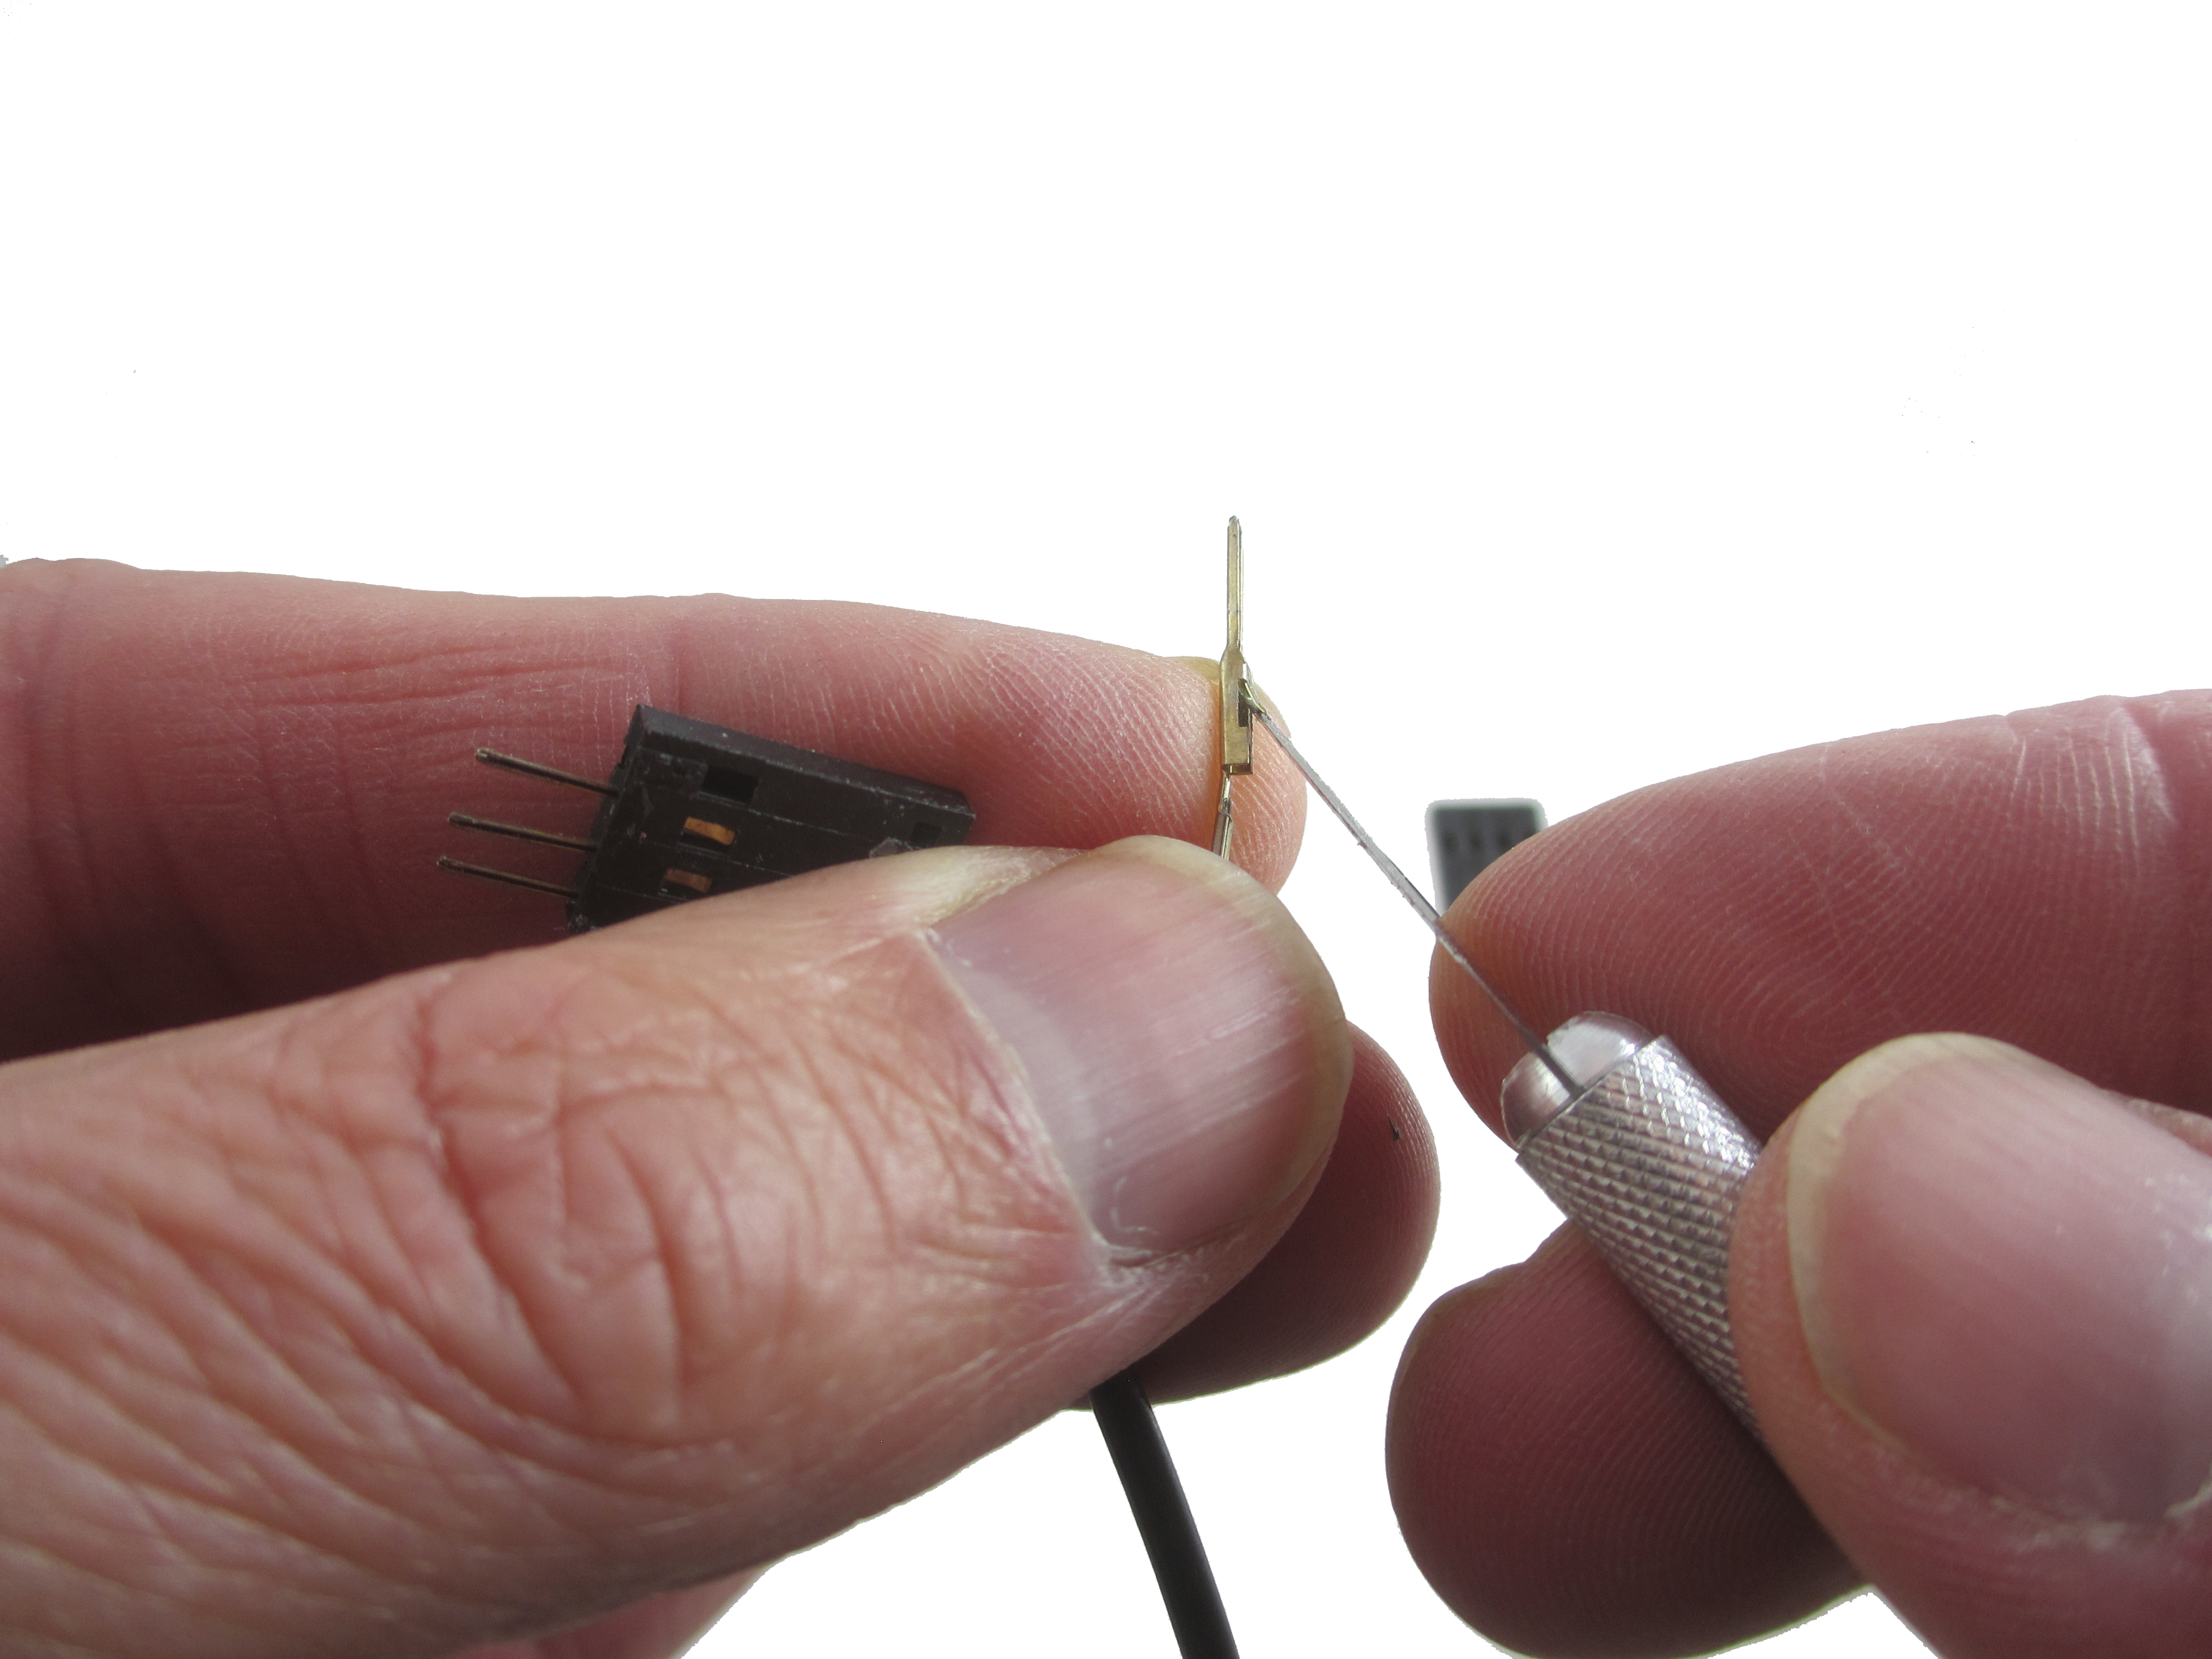
- Press the lever of the pin attached to the grey wire through the hole in the housing and then push the pin out of the housing. Don't pull the grey wire !
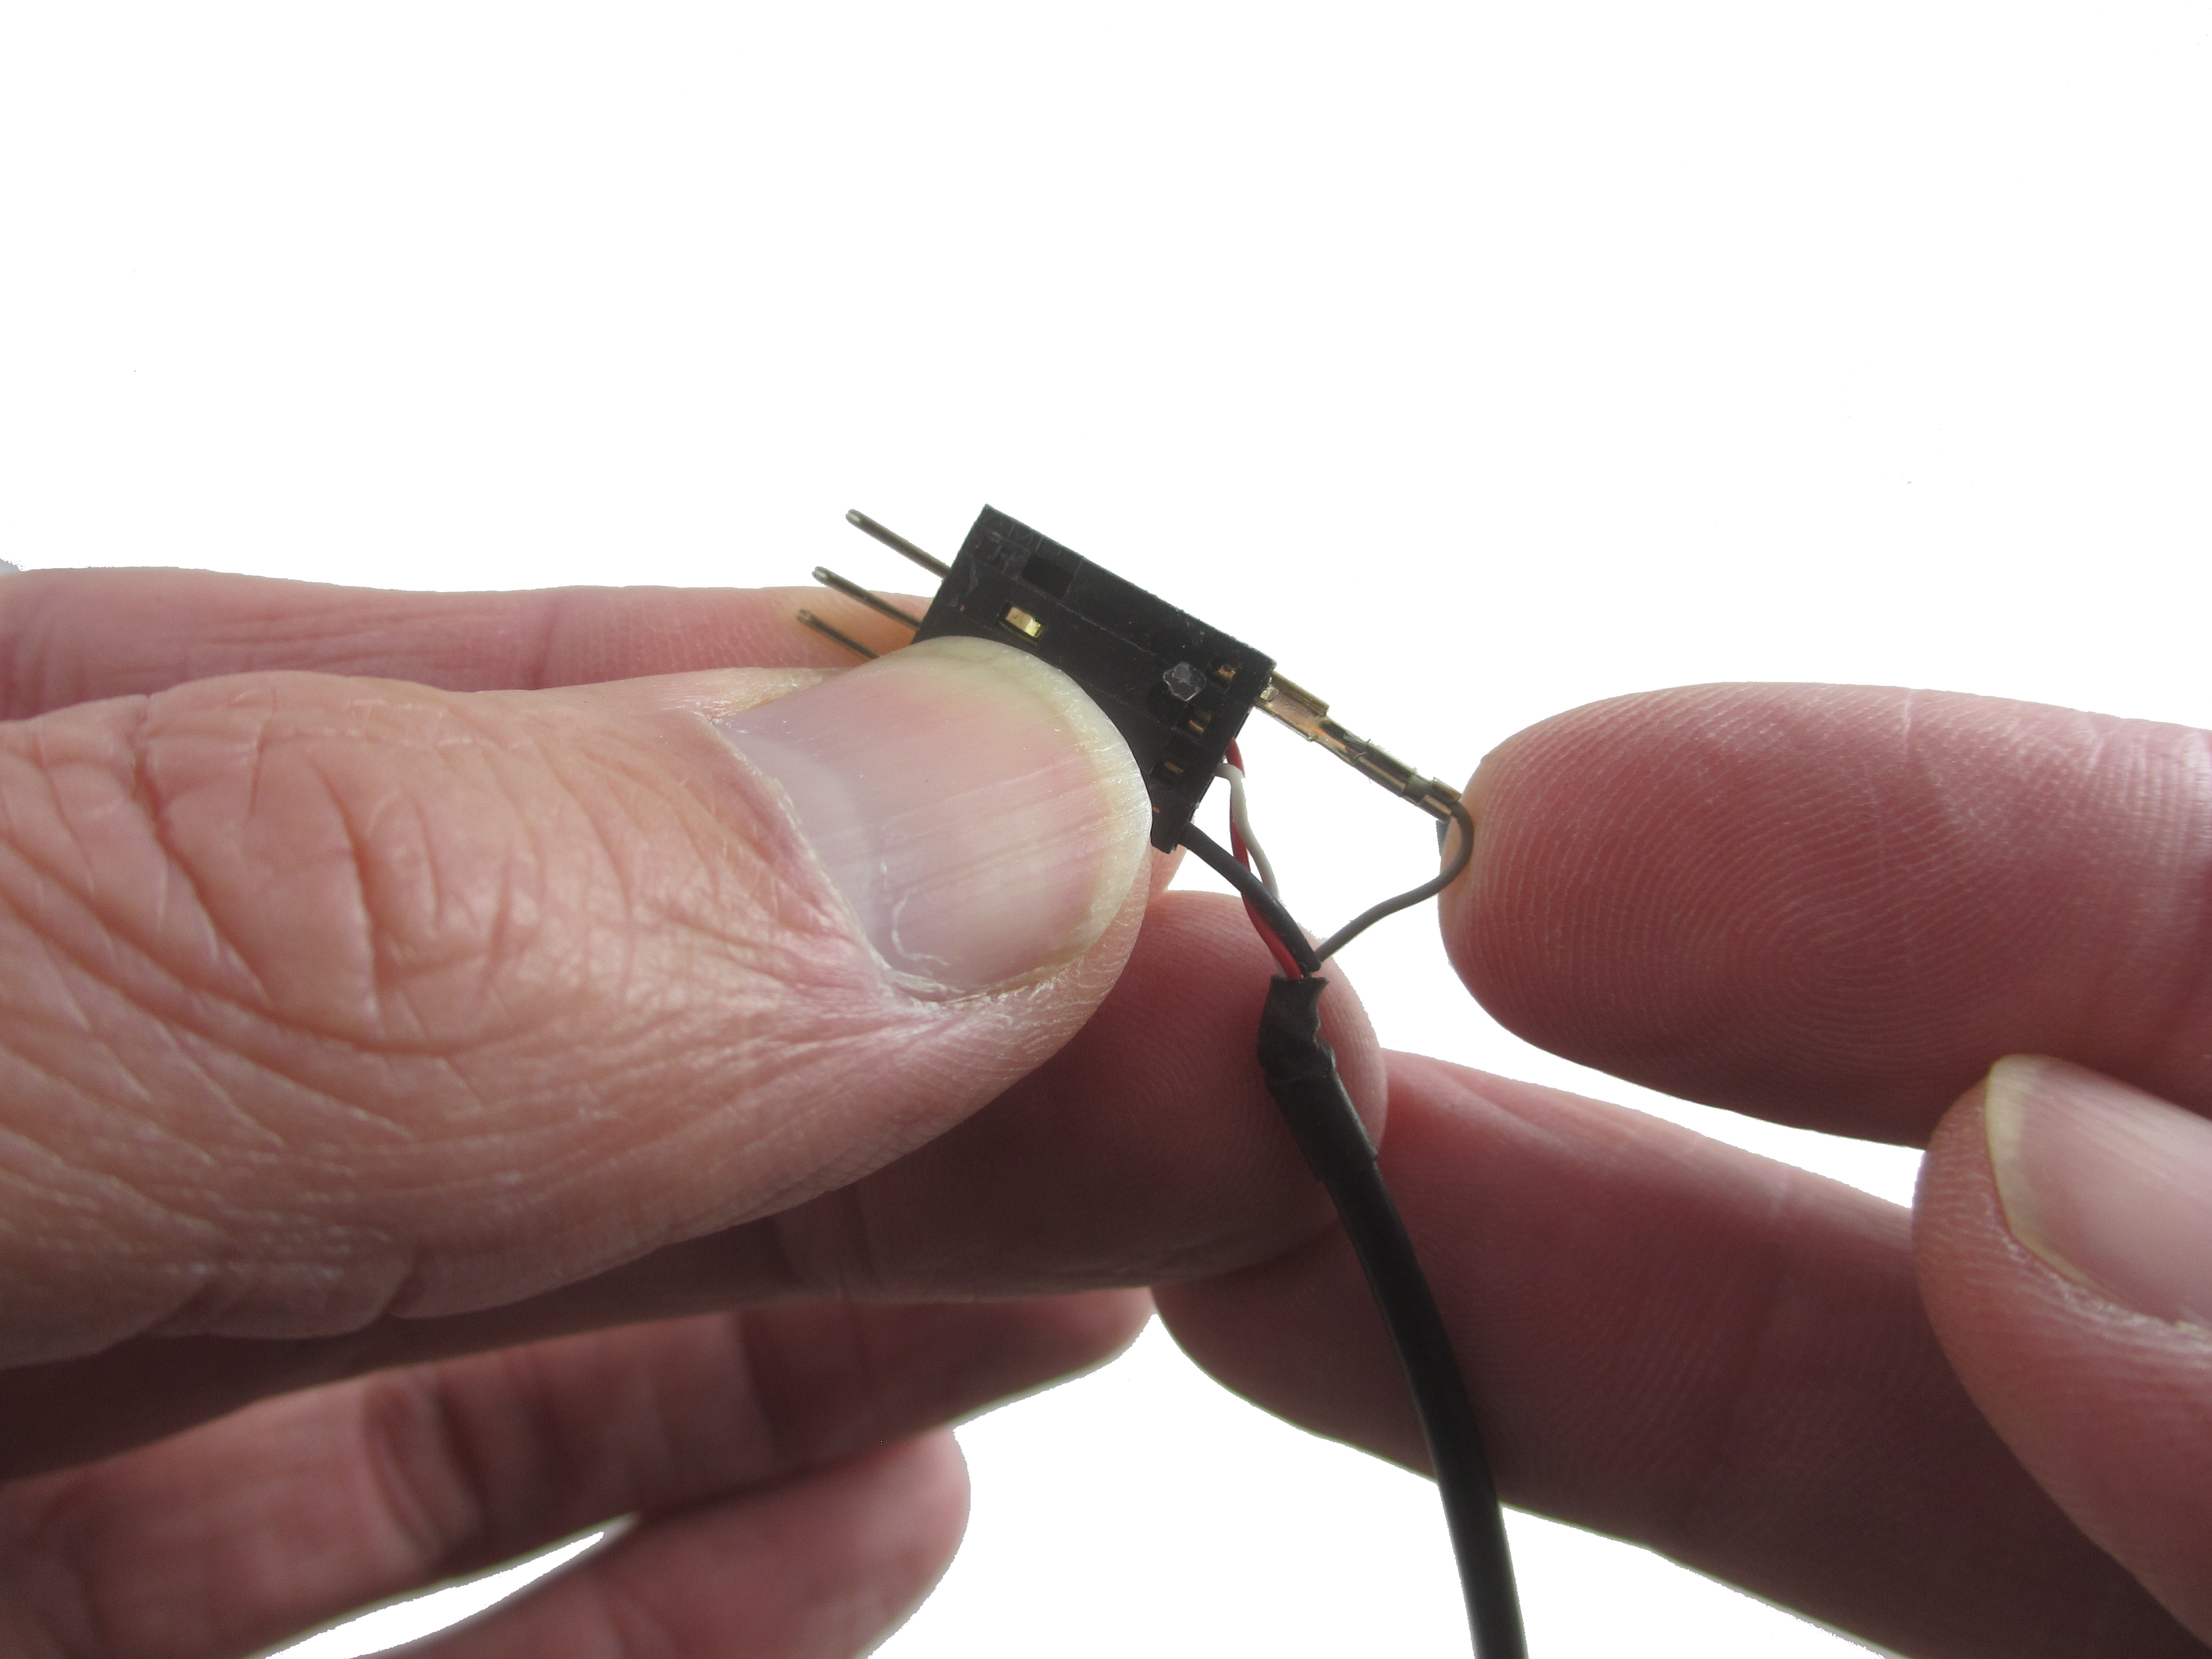
- Lift the lever of the pin and slide it into the one free slot of the other housing.
Notes:
- Wrt. step 1, apply the knife with moderate force and a bit of sawing motion, using it as a wedge to push apart the two housings. Make sure not to cut into the plastic of either housing.
- If you can't perform step 2, ie. take out the pin attached to the grey wire, it is probably glued to the housing. Use a wire cutter to cut off the plastic housing on both sides of the pin. This will break the glue and free the pin.
- If you can't perform step 3 because the wire is too short, take the 3 pins out of the housing and slide all 4 of them in together.
- If you can't perform step 3 because the pin seems to get stuck, there is probably dried glue around the pin. Take out the pin, chip off some of the glue and try to slide the pin in again.
See the pictures below (click on them to see more detail).
1. Split the plug with a sharp knife so that there are two 1x4 housings.

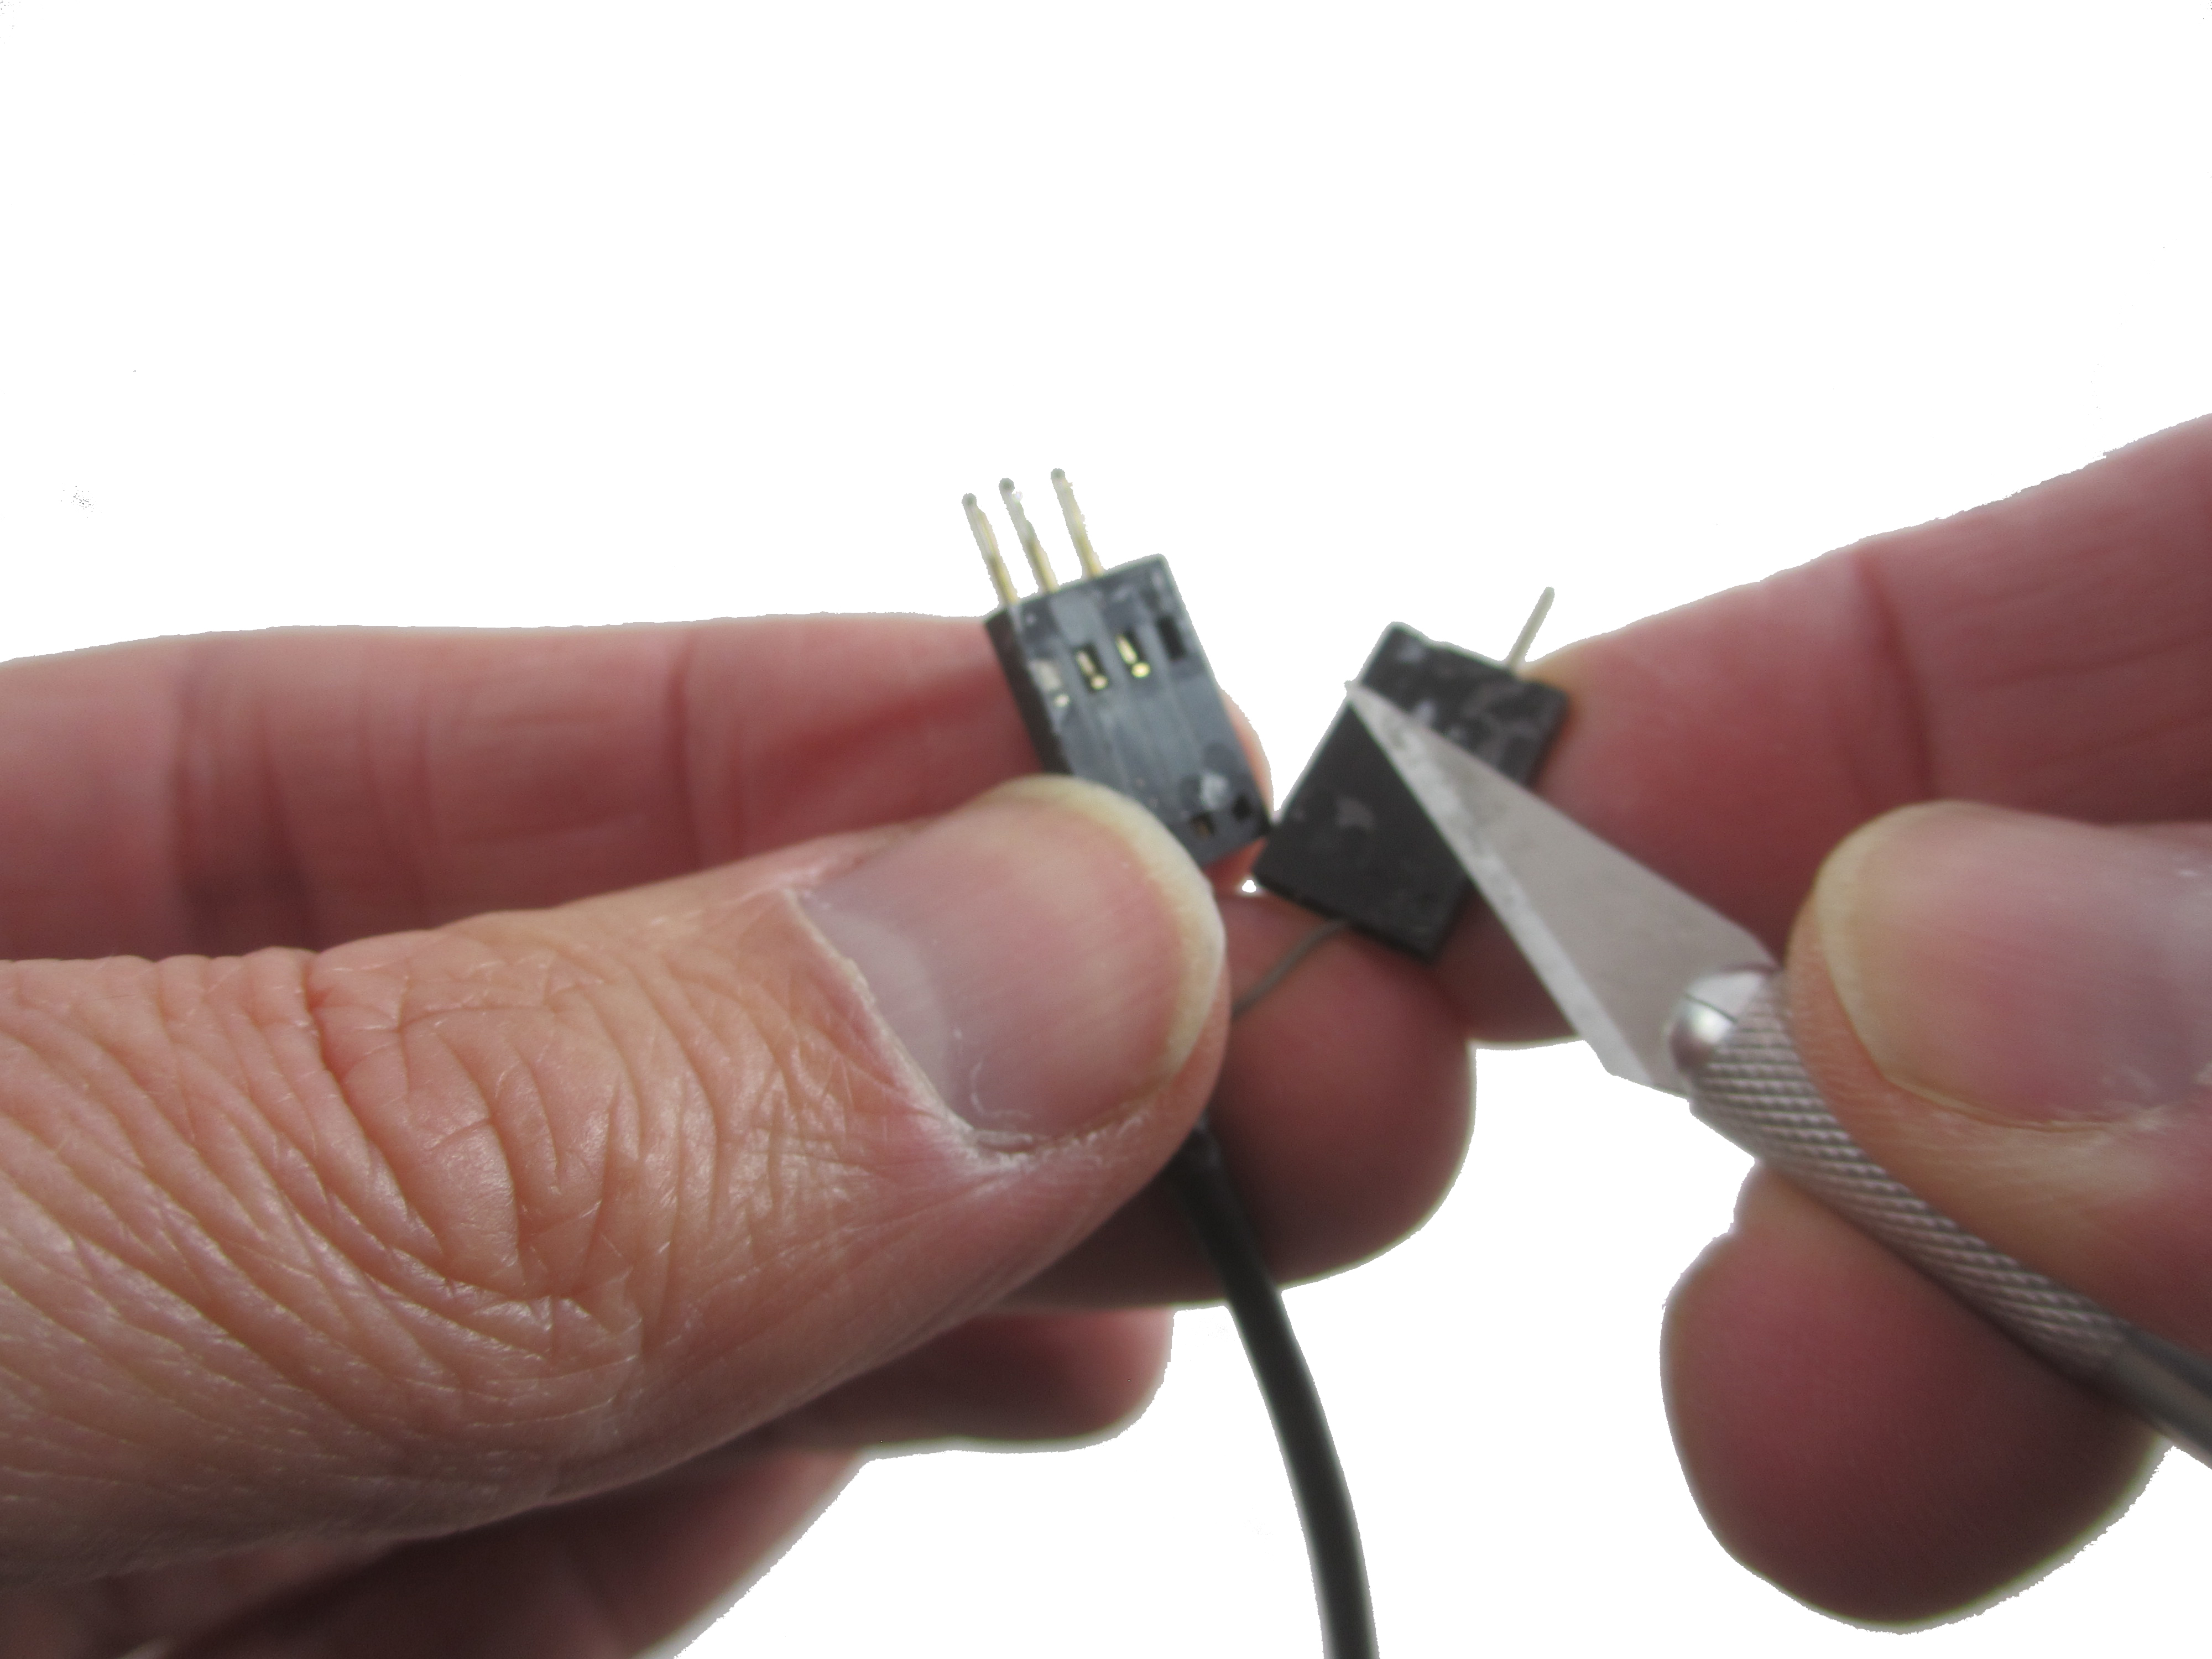
2. Press the lever of the pin attached to the grey wire through the hole in the housing and then push the pin out of the housing. Don't pull the grey wire !
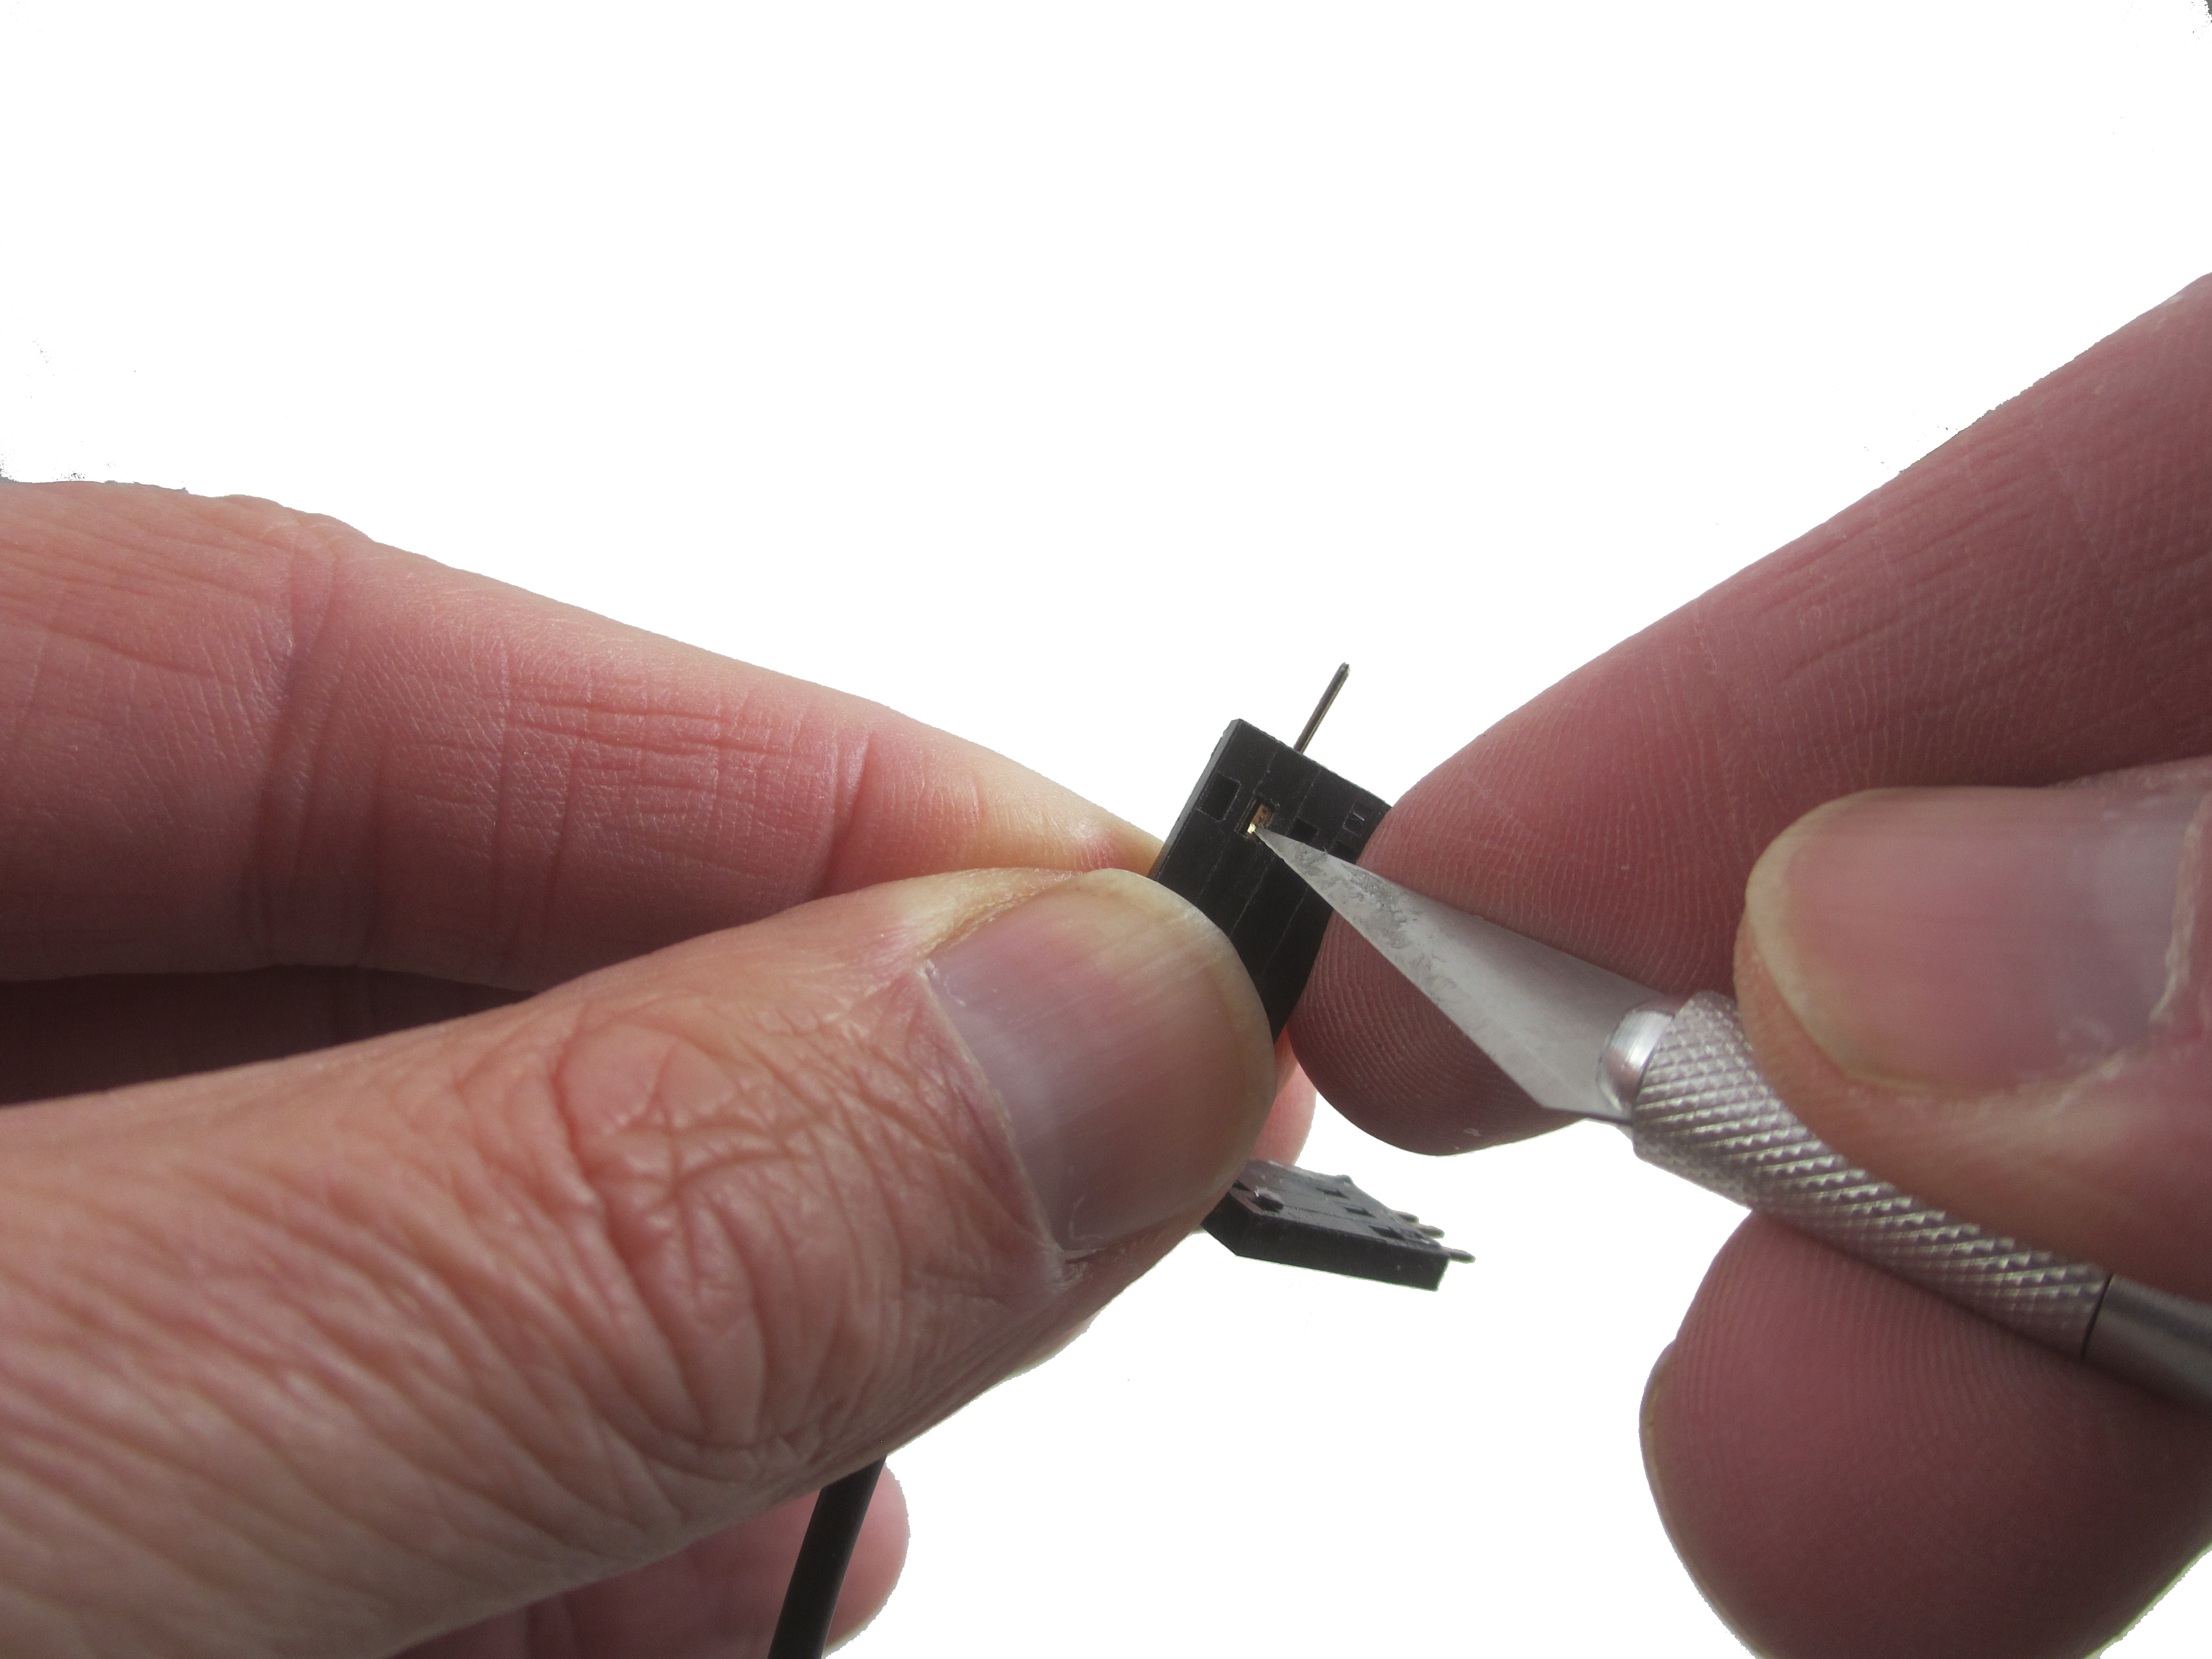

3. Lift the lever of the pin and slide it into the one free slot of the other housing.
Voilá !
|


 LinkedIn group