With such a compact footprint and good portability, it is often convenient to use the Pi in a setting without a monitor hooked up. However, it would be nice to have some amount of output to show what the system is up to. Beyond very basic and limited flashing LED lights, we can make use of the cheap I2C-based LCD and LED displays that are readily available today to provide more flexible output options.
Hardware Connections
First, the physical connections. I2C requires two pins, SDA (data) and SCL (clock), as well as GND and Power for the device itself. On the PiShield, the digital I2C pins are on the left, as follows:
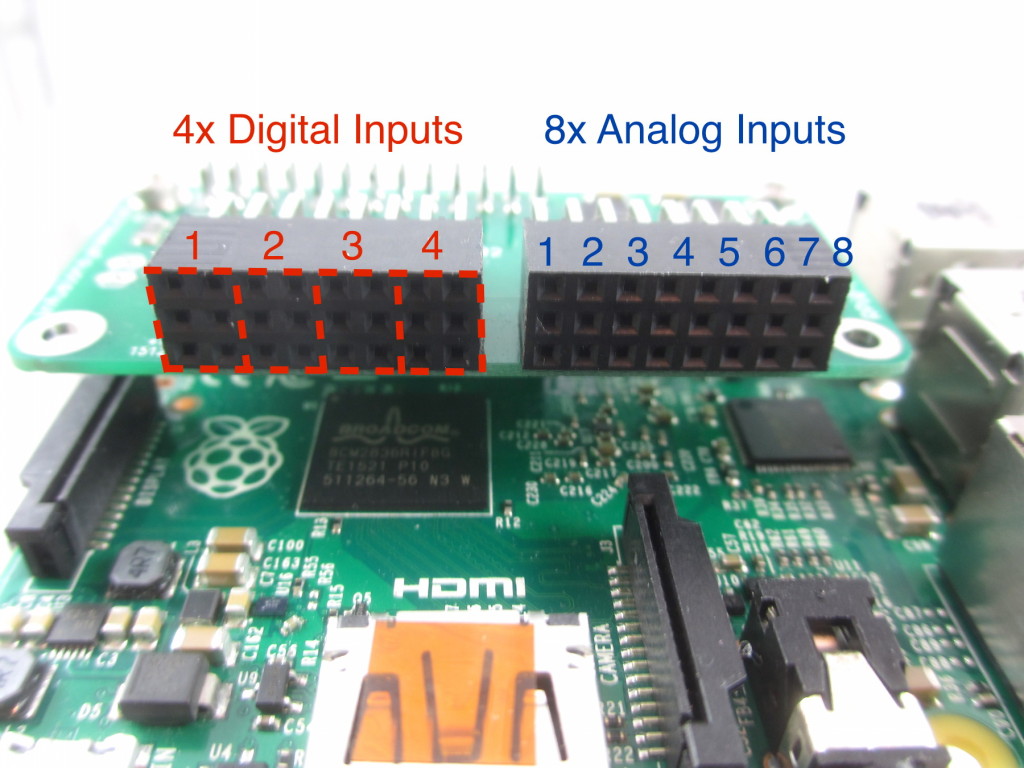
The pinout for I2C devices for the 2×3 connector are as follows:
NNN PWR
SDA SCL
NNN GND
(NNN == no connection)
You can connect your own devices using the above schematic for any I2C devices that can be powered with 5V. Alternatively, grab one of our display modules that have the connectors prebuilt!
Example 1: CPU/Disk monitor on a 1602 LCD
This python script, allows us to build a basic monitoring console that displays CPU and disk stats on a 1602 LCD. The example is built on top of Raspberrypi-Spy‘s example, and adds the commands to gather the CPU temperature using the vcgencmd command. You may have to change the I2C address of the display to match the device (default is 0x3F). If you’re starting from a basic Python configuration, you may have to install psutil using pip or a manual install.
Example 2: OLED gauge graph
Here we look at a C application, using the wonderful ArduiPi_OLED library along with wiringPi to acquire an analog sensor value and display it on a small OLED screen. To compile the code, clone the repo, and follow Charles’ instructions here. The examples folder contains an additional application called gauge, which should be compiled along with the other examples. Also, make sure you select the correct display type according by adding the following arguments:
./gauge -o 2 for 128×32
./gauge -o 3 for 128×64