Having made a nice automated plant monitoring and watering system, in this post we describe the process of adding physical gauge to it using a small servomotor.

In this case we’re using a small (9g) servo, which we drive directly off the Pi’s supply. For larger servos it is recommended to use a dedicated supply for it, as drawing too much current can lead to system instability.
Hardware Setup
While it is possible to hook up the GPIO pins and output PWM directly to drive servos, in this example we look at using a much more capable PCA9685-based I2C servo driver. This chip outputs up to 16 channels of PWM driver and can be controlled via I2C, which means very little computational load on the RPi itself, leaving lots of room to do other things.
To connect up the driver board, we refer to the I2C pinout of the headers on the PiShield:
| NNN | PWR |
| SDA | SCL |
| NNN | GND |
(NNN = no connection)
Since we’ll be powering the servo with the 5V rail of the RPi, we add an extra 5V wire from a neighbouring I2C header’s power port. Ignore this bit if you’re powering the PWM board with a separate power supply.
Software Setup
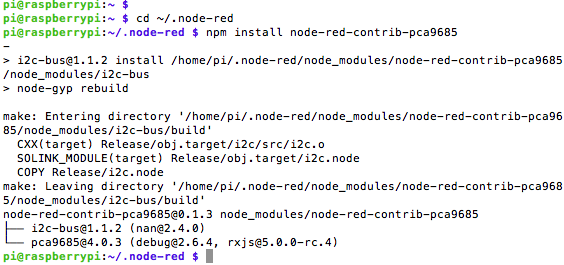
Here we see how to add the servo-driving features our previous node-red flow by first adding the driver nodes for the hardware. There is an existing PCA9685 node that can be installed as follows (assuming your node-red folder is at ~/.node-red):
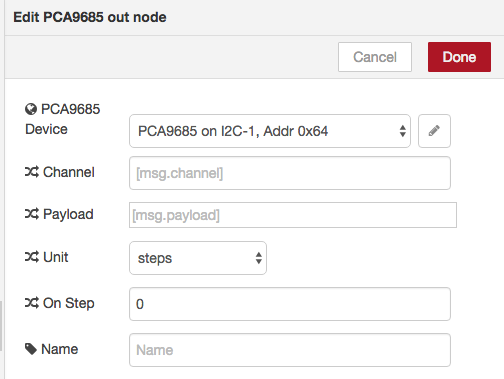
Once installed, the node should be available as an “output” node in your node-red palette:

Then, we open it up and configure it. The default address should be 0x40 (or 64 in decimal), and in this example we use “steps” mode, which is a value of between 0 and 4095 for the PWM output. The valid servo driving range is around 5 to 10% of this range, which is around 200-400. You’ll have to play around with your servo to see where the desired end points are.
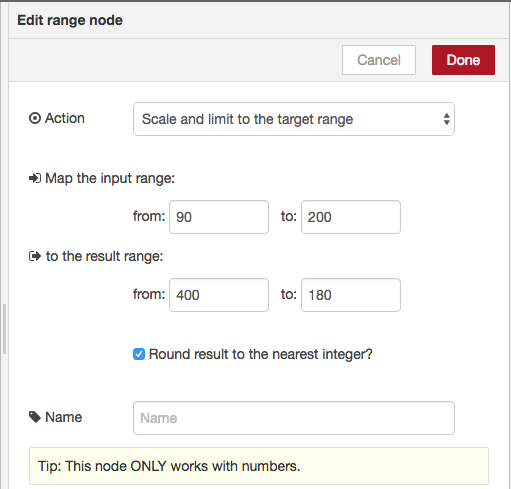
From here, we can simply map a range of moisture values to the appropriate angles of the servo:
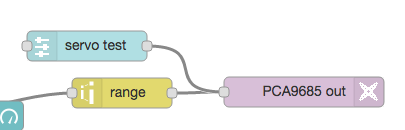
(also, note the servo test UI object that can be used to manually figure out the appropriate values).
The entire updated node-red flow (built on top of the original one) is available HERE.
Pingback: Sonifying Plant Moisture using a simple Algorithmic Arpeggiator – Infusion Systems