Difference between revisions of "SensePlay-10 QuickStart Digitizer"
(Created page with "==What you need== For this walkthrough, you will need: *A Digitizer. *A MIDI Interface. *A Turn (or other) sensor for testing. *[http://icubex.com/senseplay SensePlay softwa...") |
(No difference)
|
Revision as of 17:09, 5 January 2019
What you need
For this walkthrough, you will need:
- A Digitizer.
- A MIDI Interface.
- A Turn (or other) sensor for testing.
- SensePlay software.
Installing the Digitizer
On both Windows and MacOS, since the Digitizer communicates via MIDI, you'll first need to install and connect a MIDI interface, to which the Digitizer can be connected.
Connecting to the Digitizer
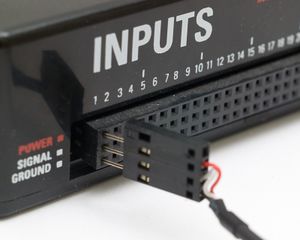
1. Connect the Turn sensor (or any other sensor) to input #1 of the Digitizer as shown below, with the red wire on top and the black wire on the bottom.
2. Start SensePlay. On MacOS it may be necessary to add a security exception in order to open SensePlay.
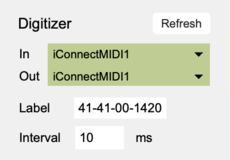
3. In the Digitizer section at the top, choose the Digitizer with matching serial number. Upon connecting, the port menu will turn green. If SensePlay failed to connect to the Digitizer, maybe the Connecting section on the Digitizer page can help you resolve the issue.
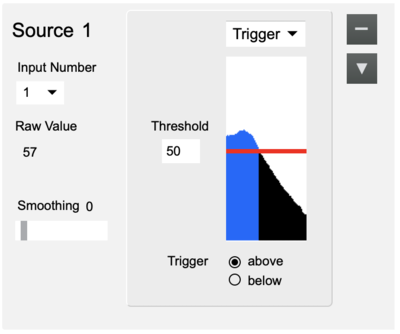
4. Click the "+" button to add a new source, then select "1" from the Input Number menu to turn on sampling of sensor input 1. The box right below the button and the graphical display will show the sensor value if changed.
5. You're up and running. For further details about using SensePlay, refer to the SensePlay help pages.


