Connect-154 QuickStart WiDig
If you're on Windows 10, please install Visual Studio 2013 redistributable packages before starting Connect.
Installing the WiDig
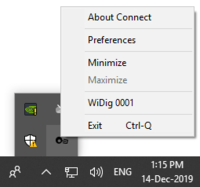
Start Connect. If you haven't installed the WiDig drivers and LoopMIDI software, Connect will popup dialogs to direct you to the webpages where to download from. If after installing the Siliconlabs driver for the WiDig no WiDig is connected to the computer, Connect will report that the Siliconlabs driver is missing. Connect the WiDig to the computer to finalize the Siliconlabs driver installation, and then start Connect. Once the software is fully installed, Connect runs in the background and can be accessed via the system tray at the bottom right of the screen.
Connecting to the WiDig
Connect the WiDig's micro USB port via the supplied micro USB cable to a USB port on the computer. It's possible to use any other micro USB cable but some cables can be of inferior quality such that the power supply to the WiDig is insufficient which may result in the inability to communicate with the WiDig.
The yellow and green LEDs on the WiDig will blink briefly. If it was in host mode the blinking of both green and yellow LEDs will stop.
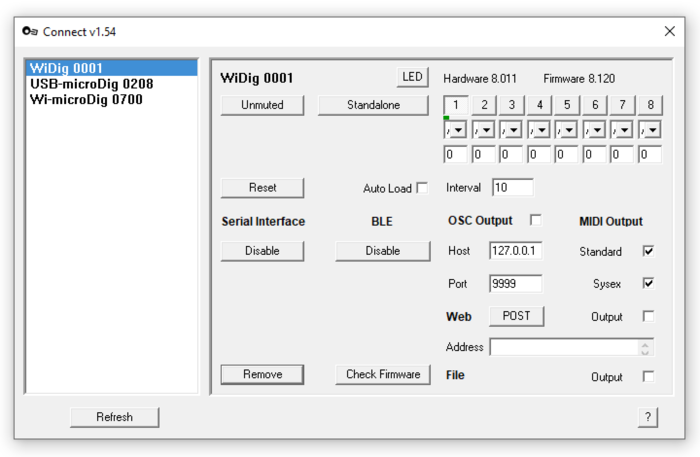
The Connect app will automatically create a virtual MIDI port with the name and serial number of that device and show it in the device list. The WiDig will also appear in the system tray menu that can be accessed by right-clicking on the icon in the system tray. You can view the device by clicking on its entry in the device list.
The WiDig is pre-configured to communicate via Bluetooth, even though it can still communicate via USB but at MIDI data rate of 31.25 kbps. Once you've successfully connected with Connect to the WiDig you will be able to set the WiDig to communicate via USB only by disabling BLE, at the higher data rate of 115.2 kbps. For a WiDig running WiConnect v1.9xx that communicates via WiFi instead of BLE the USB data rate is always 115.2 kbps.
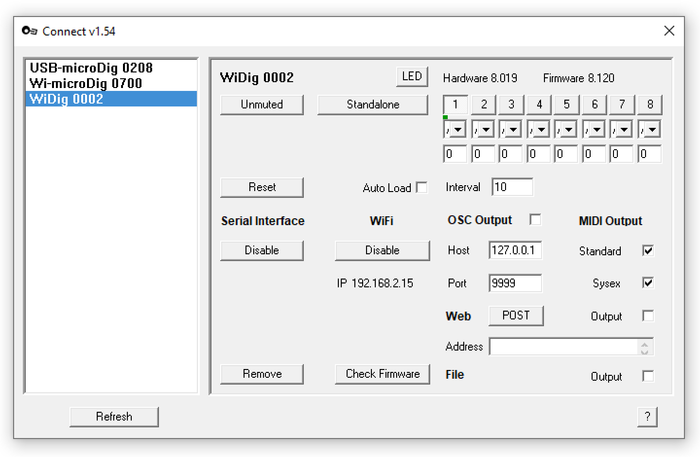
Connect will show slightly different screens depending on whether the WiDig is configured (see WiConnect) for wireless communication via BLE or via WiFi.
For detailed instructions how to setup and wirelessly use a WiDig configured for communication via BLE, see the WiDig quickstart page.
For detailed instructions how to setup and wirelessly use a WiDig configured for communication via WiFi, see the WiDig quickstart page.
If the blue LED of your WiFi-configured WiDig is blinking it is actively trying to connect to a WiFi network. During that time (about 5 minutes) it can't communicate via the serial port with Connect and hence won't appear in the devices list. Once the WiDig has connected to a WiFi network and the blue LED is steady on, or once the WiDig has ended its search for a WiFi network and the blue LED is off, click "Refresh".
To disable the WiDig's virtual MIDI port, click on the "Disable" button in the main window, or from the status bar menu.
Note that unplugging the WiDig from the USB port will also disable the virtual MIDI port and cause it to be greyed-out in the devices list.
If upon plugging in your WiDig it is not immediately recognized by I-CubeX Connect, make sure you've installed the WiDig drivers and LoopMIDI software. The WiDig drivers were installed correctly if the WiDig is listed in the Device Manager (select from the menu that appears after right-clicking on the Start menu) as a serial (COM) port.
(Un)plugging a digitizer while Connect is starting up or refreshing the list of digitizers may result in incorrect display of the status of the digitizer that was (un)plugged.


