SensePlay-10 QuickStart Wi-microDig
What you need
For this walkthrough, you will need:
- A Wi-microDig and its drivers (see below).
- Bluetooth adapter (built in to your computer if it's a Mac).
- A Turn (or other) sensor for testing.
- SensePlay software.
- Connect software (included in the Link software package).
Installing the Wi-microDig
In both Windows and MacOS, you'll first need to add the Wi-microDig as a Bluetooth device with a virtual serial (or COM) port. The Wi-microDig QuickStart page explains how to do this.
In Windows, LoopMIDI virtual MIDI port software needs to be installed as well. There's no need to create any ports in LoopMIDI.
Connecting to the Wi-microDig
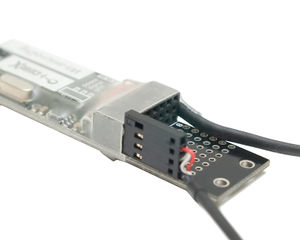
1. Connect the Turn sensor (or any other sensor) to input #1 of the Wi-microDig, as shown below, with the red wire on top and the black wire on the bottom.
2. Start Connect. On MacOS it may be necessary to add a security exception in order to open it. On Windows Connect must be running before starting SensePlay in order for SensePlay to recognize the MIDI port(s) that Connect creates.
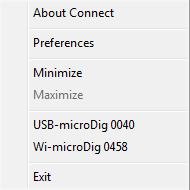
3. In MacOS, in Connect, enable the Wi-microDig with matching serial number. Once enabled, the blue LED on the Wi-microDig will illuminate and the Wi-microDig entry will be listed in bold. If you don't see the Wi-microDig listed in Connect, make sure it was added as a Bluetooth device to the operating system and added in Connect. See also the Wi-microDig QuickStart pages and the Connect QuickStart page.
3. In Windows, wait until a message has appeared in the Windows System Tray confirming that the Wi-microDig has been recognized by Connect. Ignore any system tray messages regarding a failed connection with a Standard Serial over Bluetooth link. Once enabled, the blue LED on the Wi-microDig will illuminate and the Wi-microDig entry will be listed in bold. If you don't see the Wi-microDig listed in Connect, make sure it was added as a Bluetooth device to the operating system and that LoopMIDI was installed. If you can't (re-)connect with a Wi-microDig, it may be necessary to re-create the Outgoing serial port, in the Bluetooth settings under "More bluetooth options", in the tab "COM ports". See also the Wi-microDig QuickStart pages.
4. Start SensePlay. On MacOS it may be necessary to add a security exception in order to open it. Note that on MacOS, the next time you run SensePlay and Connect isn't already running, Connect should be started automatically when starting SensePlay.
If you're using a computer with Apple's M1 processor, you'll need to run SensePlay under Rosetta as follows:
- Click the SensePlay icon in the Finder.
- Click the File menu in the Finder and choose the option "Get Info".
- In the Get Info window, tick the checkbox next to "Open using Rosetta".
- Close the Get Info window.
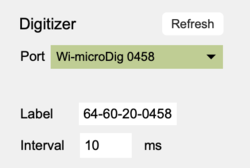
5. In the Digitizer section at the top, choose the Wi-microDig with matching serial number from the pulldown menu. Upon connecting, the port menu will turn green. If SensePlay doesn't connect to the Wi-microDig, check that your Bluetooth is turned on, that the Wi-microDig is powered and that it is listed in bold in Connect. SensePlay will not warn you if once of these conditions hasn't been met, it will just not connect. If you can't get SensePlay to connect to the digitizer, maybe the Connecting section on the Digitizer page can help you resolve the issue.
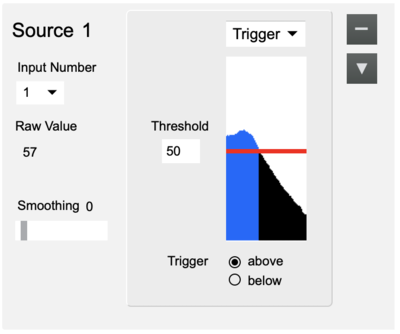
6. Click the "+" button on the left to add a new source, then select "1" from the Input Number menu to turn on sampling of sensor input 1. The box right below the button and the graphical display will show the sensor value if changed.
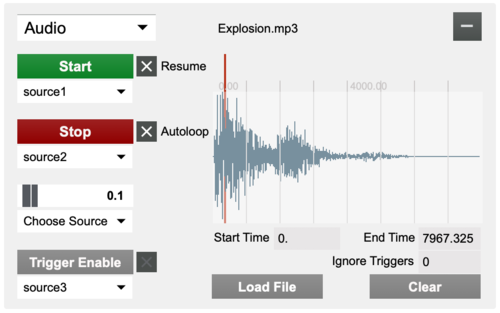
7. Click the "+" button on the right to add a new output, then drag a sound file into it. Select "Source1" from the pull-down menu below the Start button to allow the Start button to be triggered by the source. Make the sensor output a value that crosses the threshold set in the source and the sound file should start to play.
8. You're up and running. For further details about using SensePlay, refer to the SensePlay help pages.
