Adding the Wi-microDig as a Bluetooth device
Mac OS X (10.9 Mavericks)
-
Open the System Preferences. Click on Bluetooth. You will see the following window:
-
Click on "Pair", and then the following will appear:
-
Click "Options..." and then type in the number 1 and click "Pair".
The serial port will be created automatically and the Wi-microDig will appear as "I-CubeXWi-microDigXXXX-" in Link.
Mac OS X (10.8 Mountain Lion and previous versions)
-
Open the System Preferences. In Bluetooth preferences, click on the + button to start the
Bluetooth Setup Assistant.
-
Click on "Any Device" and Continue. You should see the Wi-
microDig in the list of devices.
-
In Passkey Options, choose "Use a specific passkey".
-
Click Continue. A popup will ask to enter a passkey. Click on "Don't Pair", and then click continue again.
-
When the main dialog asks for the passkey, enter the number 1 and
Click continue.
The dialog should say "A computer serial port was created". Click
Quit. Your Wi-microDig is now ready to use with Max/MSP.
Windows
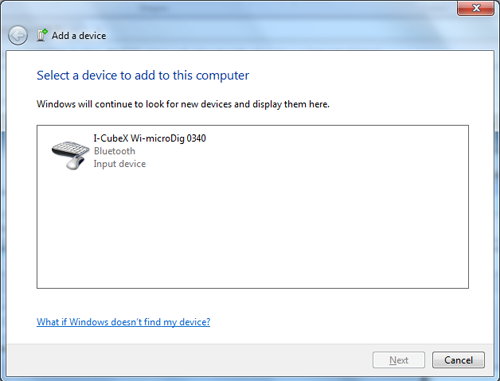
Once your Bluetooth adapter has been installed (including any necessary drivers), either click the Bluetooth icon in the system tray, or go to Start > Control Panel > Hardware & Sound > Add a Bluetooth device.
When you are asked to enter a passkey, enter the number 1 and click Next.
You should then see the following screen:
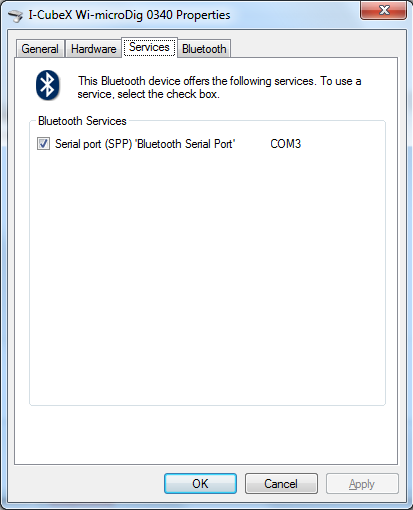
Finally, to figure out which COM port the Wi-microDig is on, go to Start > Control Panel > Hardware & Sound > Devices and Printers. Right-Click on the Wi-microDig and choose "Properties". Then, in the "Services" tab, you should see the COM port listed. In the example below, the port is COM3.


 LinkedIn group