This page contains documentation specifically for the sensors in the Kickstarter packs, but can also be used as general reference for setting up other sensors for another application.
Whether you opted for the DIY pack or the I-CubeX pack, you’ll end up with sensors that can detect the following: (The first name in brackets refer to the DIY pack, while the second refers to the I-CubeX sensor)
– Physical turning of a knob (potentiometer, Turn)
– Amount of ambient light (light sensor/photoresistor, FlashOn)
– Touch (capacitive, ReachOn)
– Distance (IR, ReachClose)
Finally, not quite a sensor but you’ll also have a cool red laser emitter that can be combined with the light sensor to make a movement trigger (think James Bond), or the first note of a laser harp!
If you are using the DIY sensor pack, check out the wiring instructions here. If you are using the I-CubeX Sensor Pack, you can proceed to the connections section below.
Connections:
Follow these introductory steps to set up your RPi B+, Pi2B or Pi3 or the Pi Zero. Also, you should have a microSD card with your kit that contains our pre-configured system image. Take a look here for some details regarding whats on the image, as well as to configure your wifi credentials if you’re running it in headless mode!
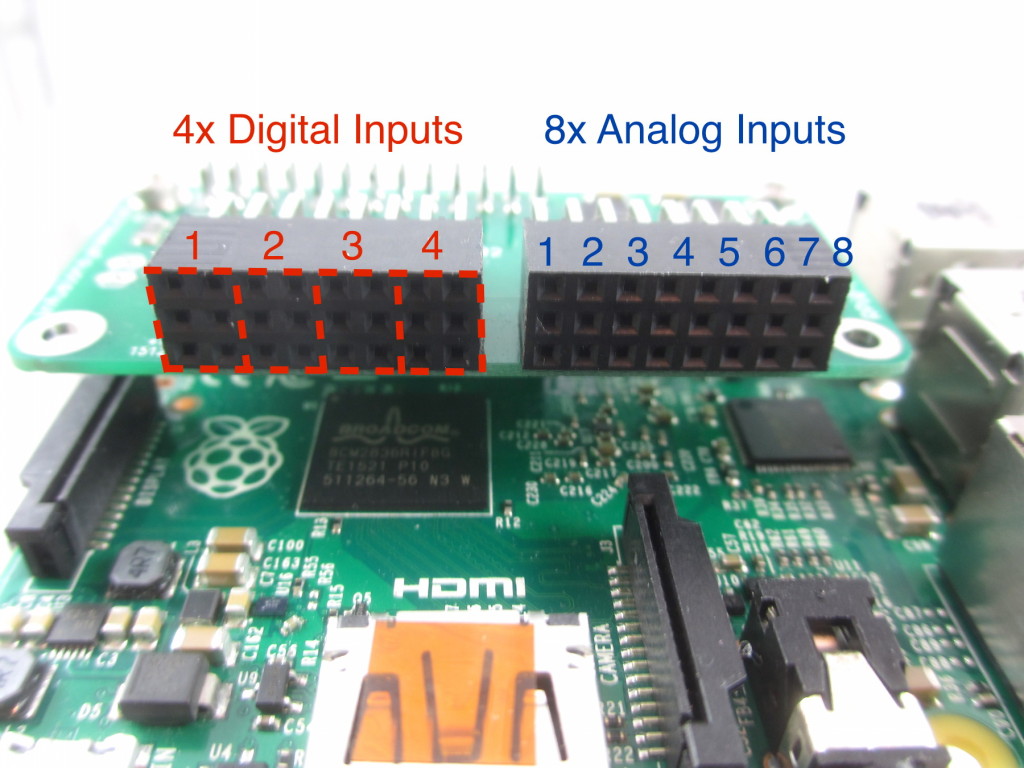
All the sensors in the pack are analog, and go in to the inputs on the right side of the PiShield:
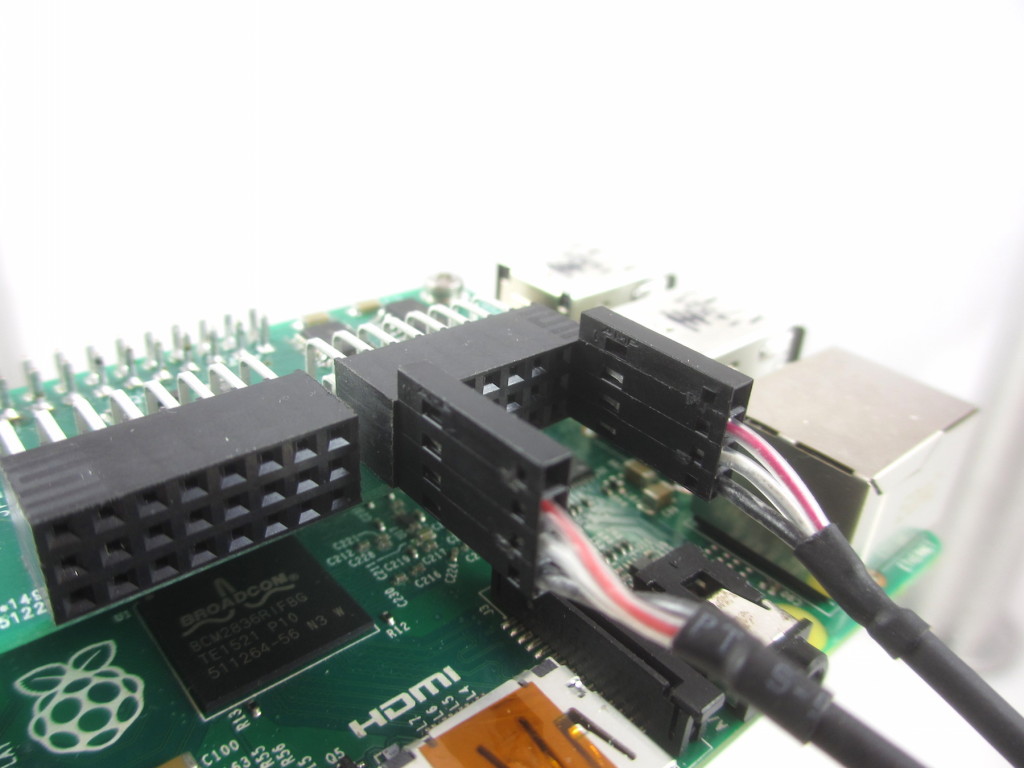
The following image shows two sensors connected into the first and last channels:
Now we are ready to boot it up and try out the sensors! The next series of instructions each demonstrate one particular bit of software to illustrate the use of the sensor and serves to get you used to the different possibilities, and there’s no reason why you can’t mix and match to create your awesome project!
Example 1: Turning
The potentiometer, or I-CubeX Turn, measures rotations of the knob. In this basic example, we stream data from the command line as one of the simplest ways of looking at sensor data on the Raspberry Pi!
First, make sure the PiShield and the Turn/Potentiometer sensor is plugged into the Pi. Then, power it up and either log into the terminal via a connected display or SSH (see introductory tutorials if necessary).
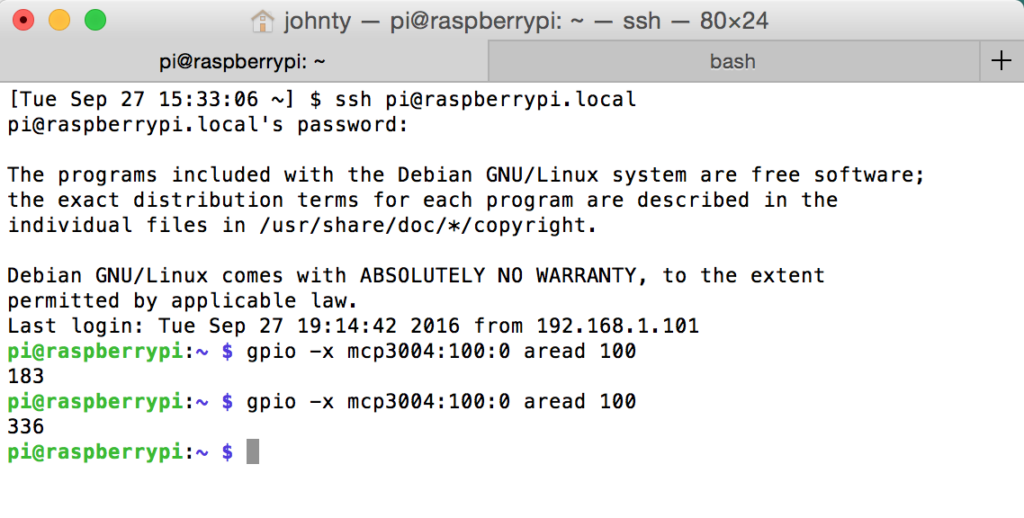
Once logged in, type the following command into the terminal:
gpio -x mcp3004:100:0 aread 100
This will read the first channel of the analog port of the PiShield. You should see a number being returned. Turn the sensor, and type the command again. You should see it change!
This probably doesn’t look so exciting, but at least it shows that your hardware is all working correctly. So lets move on to more exciting things!
Example 2: Touch me!
In this example we use the capacitive sensor (ReachOn) to trigger an event using a Python script.
First, connect the TouchOn capacitive sensor to the first input of the PiShield’s analog input port. Then, open up a terminal and go to the ~/dev/PythonExamples folder. From here, type python TouchMe.py:
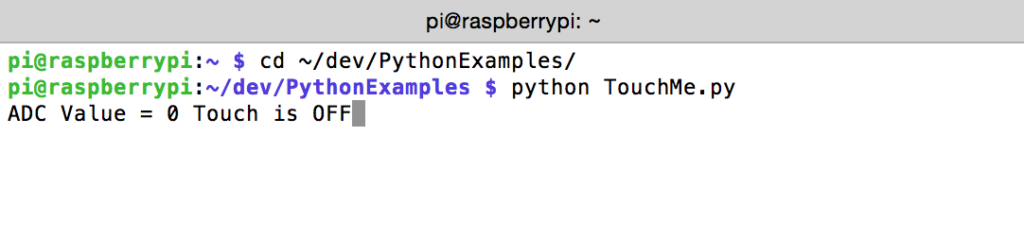
When you put your finger on or near the sensing pad, you should see see the value change:

When you are done, press ctrl+c to quit the application.
Example 3: Movement Detection
In this example, we make use of the IR sensor to detect movement. We also introduce the awesome node-red platform that provides nice looking dashboards and open up the possibility to hook up sensor data to various online services.
The previous examples used a single terminal and could either be done on the Pi itself, or via SSH. This example is much easier to work with using a second computer, as we’ll be starting the node-red server on the Pi and accessing it through a browser. Therefore, it is recommended to use a second computer for this.
First, in a terminal on the Pi, run the command node-red. You should see it booting up (may take a few seconds, especially on a Pi zero or older model B/B+):
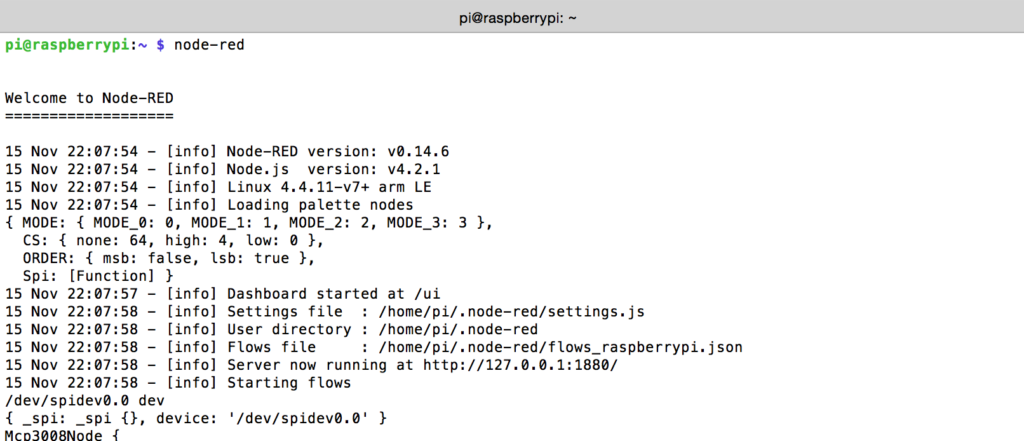
Once it has finished loading, you can open up a browser on any computer on your local network, and type the following into the address:
http://raspberrypi.local:1880/
You should see the following:
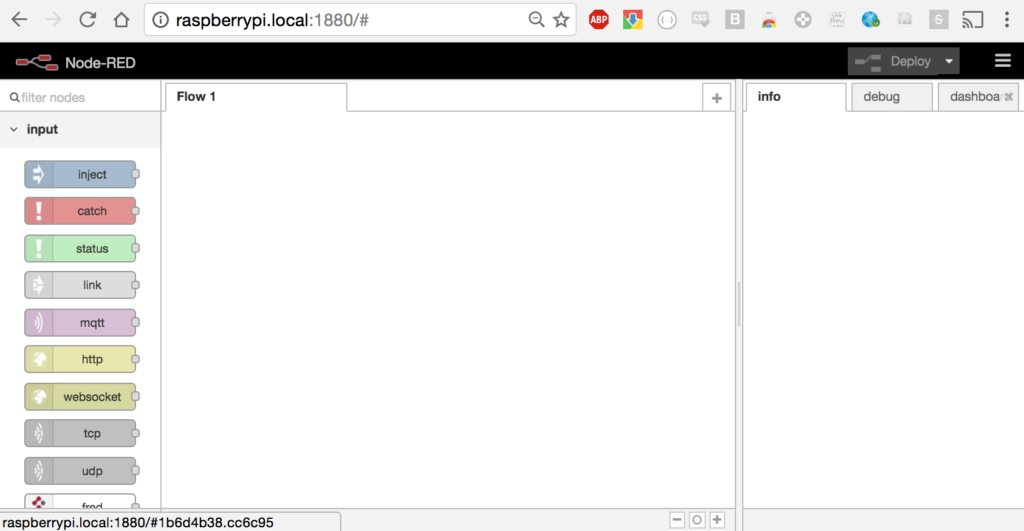
If you are familiar with node-red, you can scroll down to the node list on the right to find the “mcp3008” node, and use it according to the built in instructions. However, as a first time user you can simply load our example, basic_read from the built in library from the menu button on the top right:
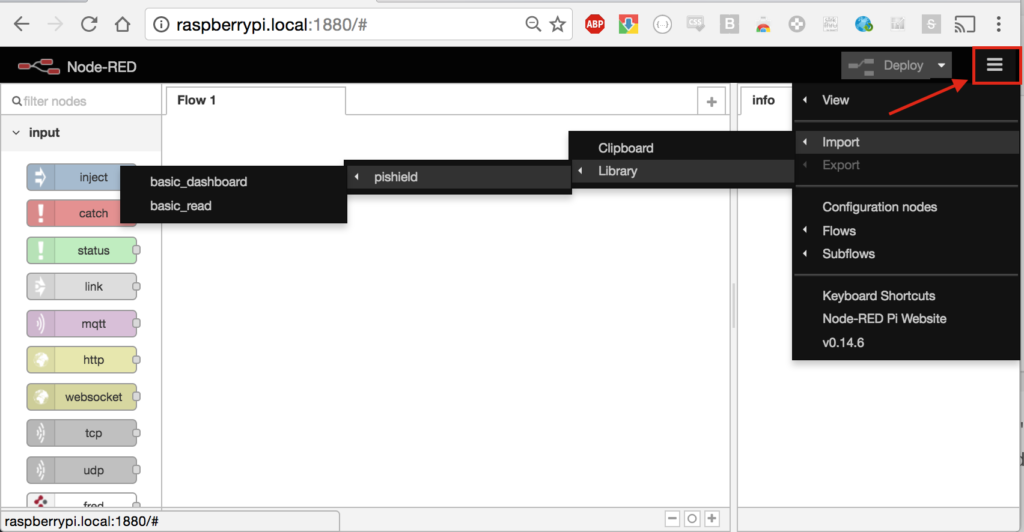
This should allow you to drop the nodes required to get sensor data from the PiShield:
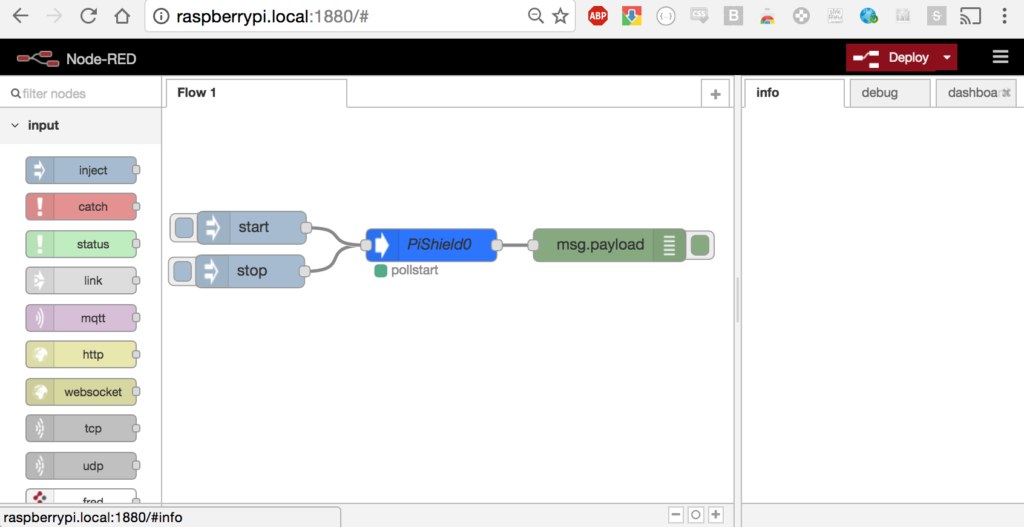
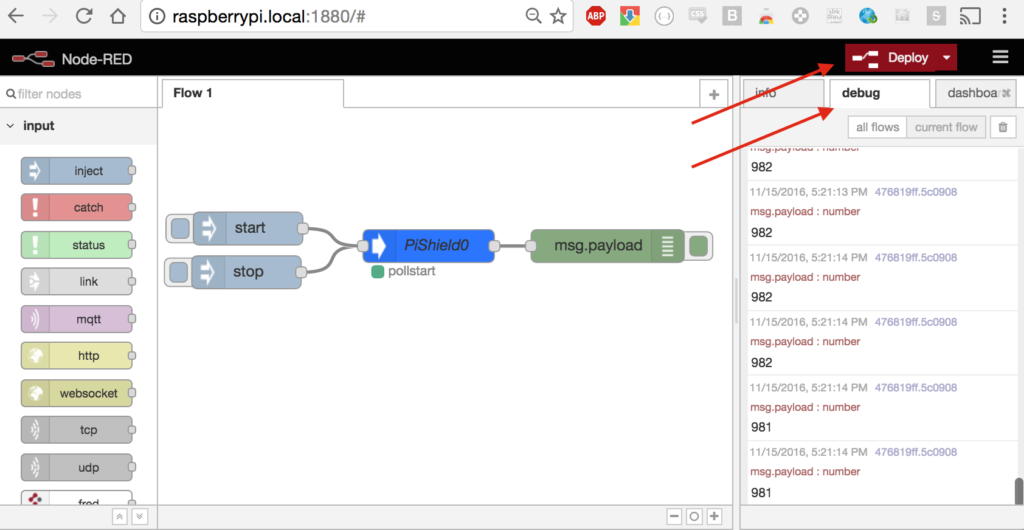
In this example, the start/stop nodes inject commands to the PiShield node (which is an mcp3008 node running on the 1st analog channel that allows us to talk to the A2D chip). The output is simply sent into the green debug node which spits out the incoming data to the console.
To see it in action, hit the red “deploy” button near to top right, and then click on the debug tab to show the output. You should see the sensor data appear inside the debugging tab below:
Check out our other node-red related pages in the documentation for more interesting things you can do with it!